Dewstack has a built-in image editor for the three things documentation screenshots actually need: crop away the irrelevant window, highlight the region that matters, and arrow at the control the reader has to click. It opens over the page, works on the image already in your article, and replaces it in place when you apply.
It is built for SOPs and step-by-step guides, where a raw full-window screenshot is close to useless – the reader can see forty controls and no indication of which one you mean.
Opening the editor
There are two ways in, and they do the same thing:
- In a page. Click an image in the editor to bring up its floating toolbar, then click Advanced Edit – the pencil icon at the far right of that bar, after the separator.
- In a FlowCapture capture. On the Edit Steps review screen, expand a step and click Crop/Edit above its screenshot. It is the same editor, with the same tools.
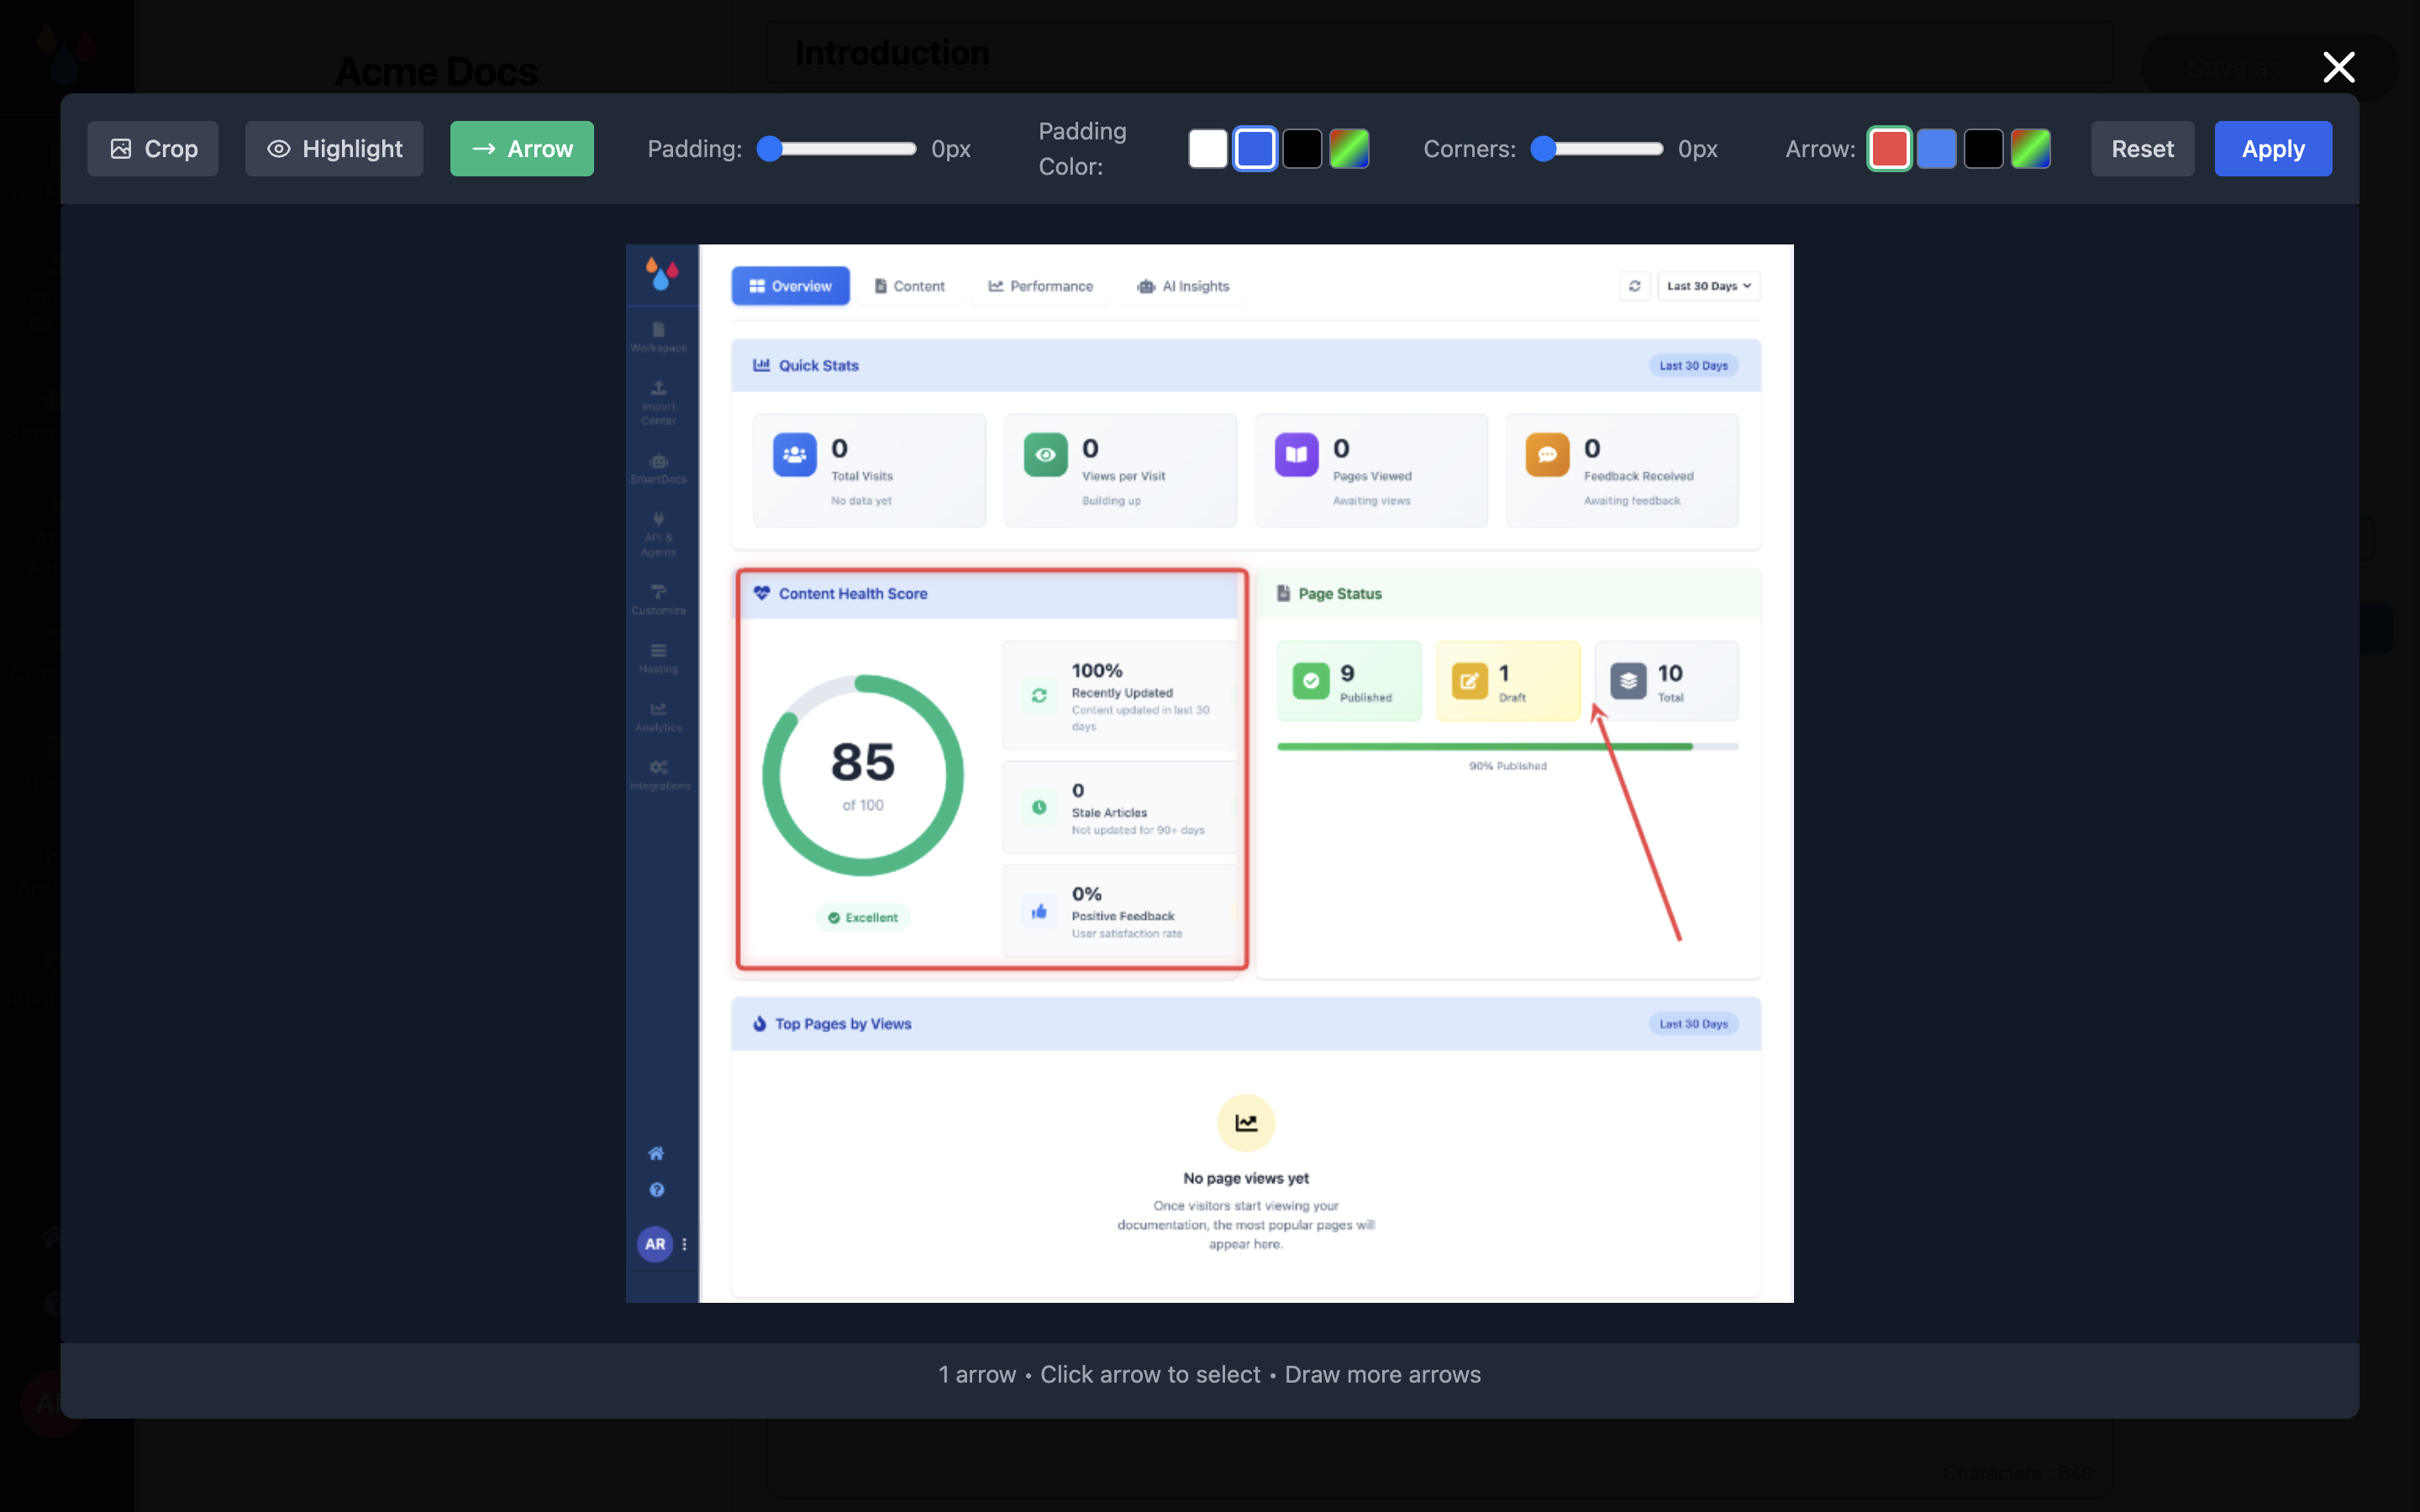
The tools
Crop
Crop is the tool you land on. Drag a rectangle over the part of the screenshot you want to
keep; a live W × H readout follows the cursor. Drag the handles to adjust it, drag inside the
box to move the whole selection, and click outside it to clear the crop and start again.
Crop first. Everything else – highlights, arrows, padding – is positioned relative to what survives the crop.
Highlight
Highlight draws a red rounded rectangle around a region: a field, a button, a row in a table. Drag to place it, then drag its handles or its body to adjust.
There is one highlight per image. Drawing a second replaces the first. If you need to call out two things, that is usually a sign it should be two steps and two screenshots.
Arrow
Arrow points at a control. Drag from where you want the tail to where you want the head. Unlike highlights you can add as many as you like.
Click an arrow to select it, then drag its endpoints to reshape it or press Delete /
Backspace to remove it. Escape deselects. While Arrow is active a colour row appears – red,
blue, black, or a custom colour – so an arrow can stay visible against a dark UI.
Padding and corners
Padding adds a coloured margin around the image, 0 to 50 pixels, in white, blue, black or a colour you pick. Corners rounds the image's corners, 0 to 30 pixels.
These are cosmetic. They earn their place when a screenshot's own background is the same colour as your docs page and the image bleeds into the text – a few pixels of padding gives it an edge.
Reset and Apply
Reset discards every change and returns to the image you opened. Apply saves.
What Apply does
Apply flattens everything – the crop, the highlight, the arrows, the padding – into a single new PNG at the original resolution, uploads it, and swaps it into your page. Your article then autosaves.
Editing is not reversible
The saved image is a flat PNG. The crop and the annotations are baked into the pixels: reopening the editor gives you your annotated image as a fresh starting point, not editable shapes. You cannot move an arrow you applied yesterday, and cropping twice crops the already-cropped image.
The original file is not deleted, so the safe pattern for anything you may revise is to keep the untouched screenshot somewhere and re-upload it rather than re-editing.
What the editor does not have
Worth knowing before you plan a screenshot standard around it. There is no text tool, no
blur or redaction, and no undo/redo – Reset is the whole undo story. There is also no
free-form drawing, no numbered step badges, no zoom, no rotate or flip, and no resizing beyond
what cropping gives you.
For redaction in particular: there is nothing here that will black out a customer name. Take the screenshot with test data instead.
Limits
- Input: JPEG, JPG, PNG and GIF, up to 5 MB. SVG and WebP are not accepted – convert them to PNG first.
- Output: always PNG, at the original image's resolution.
- Animated GIFs are flattened to their first frame.
- Images hosted elsewhere. The editor needs to read the image's pixels, which an external image server may refuse. If you see "Failed to load image for editing. The image server may not support editing", the image is hot-linked from another site. Download it, upload it to Dewstack with Insert Image → Upload Image, and edit that copy.
The editor itself is available on every plan. Recording with FlowCapture, one of the places it opens from, is not.