A finished recording does not become a page on its own. It lands in FlowCapture in the dashboard sidebar as a pending capture, and stays there until you review it and choose where it goes. Nothing appears on your docs site until you do.
The review screen has two steps: Edit Steps, where you fix the screenshots and the step text, and Review & Save, where you edit the assembled page and publish it.
The FlowCapture list
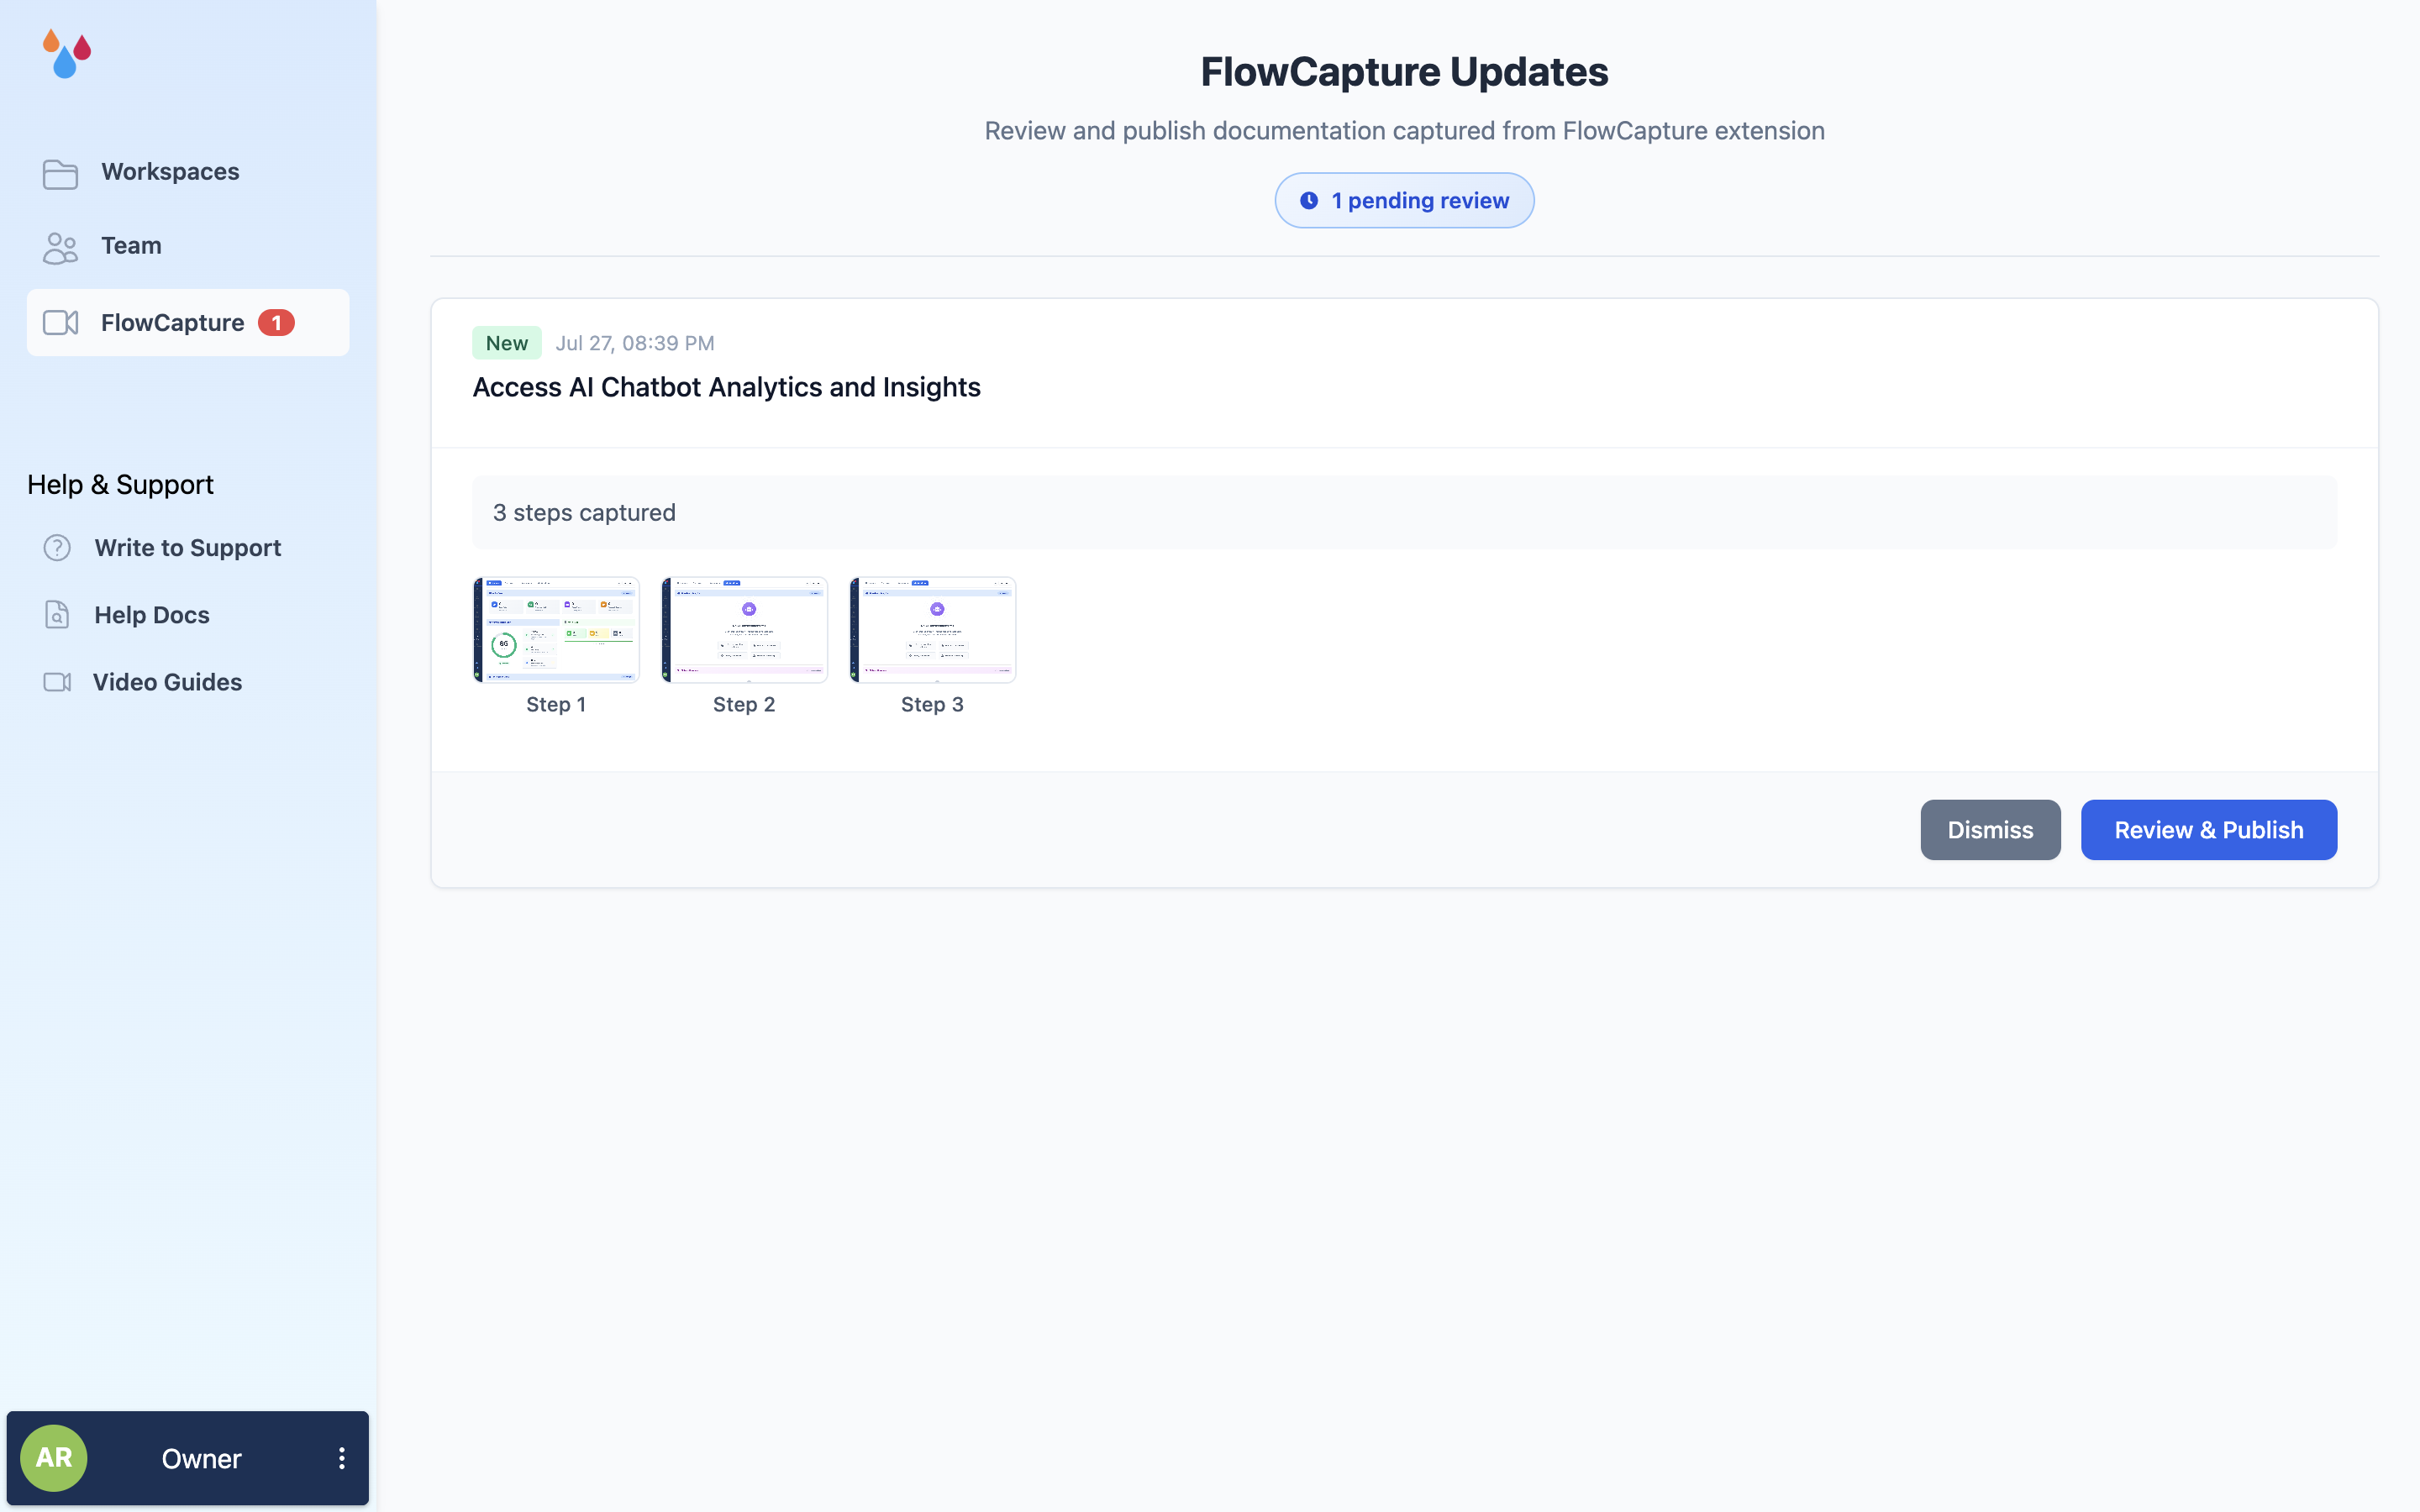
Open FlowCapture in the left sidebar. The page is headed FlowCapture Updates, with a "1 pending review" pill under it, and each capture is a card carrying a New badge, the date and time it was recorded, the title Dewstack suggested, a "3 steps captured" line and a row of numbered thumbnails. The sidebar entry carries a count badge while anything is waiting.
Each card offers Dismiss and Review & Publish.
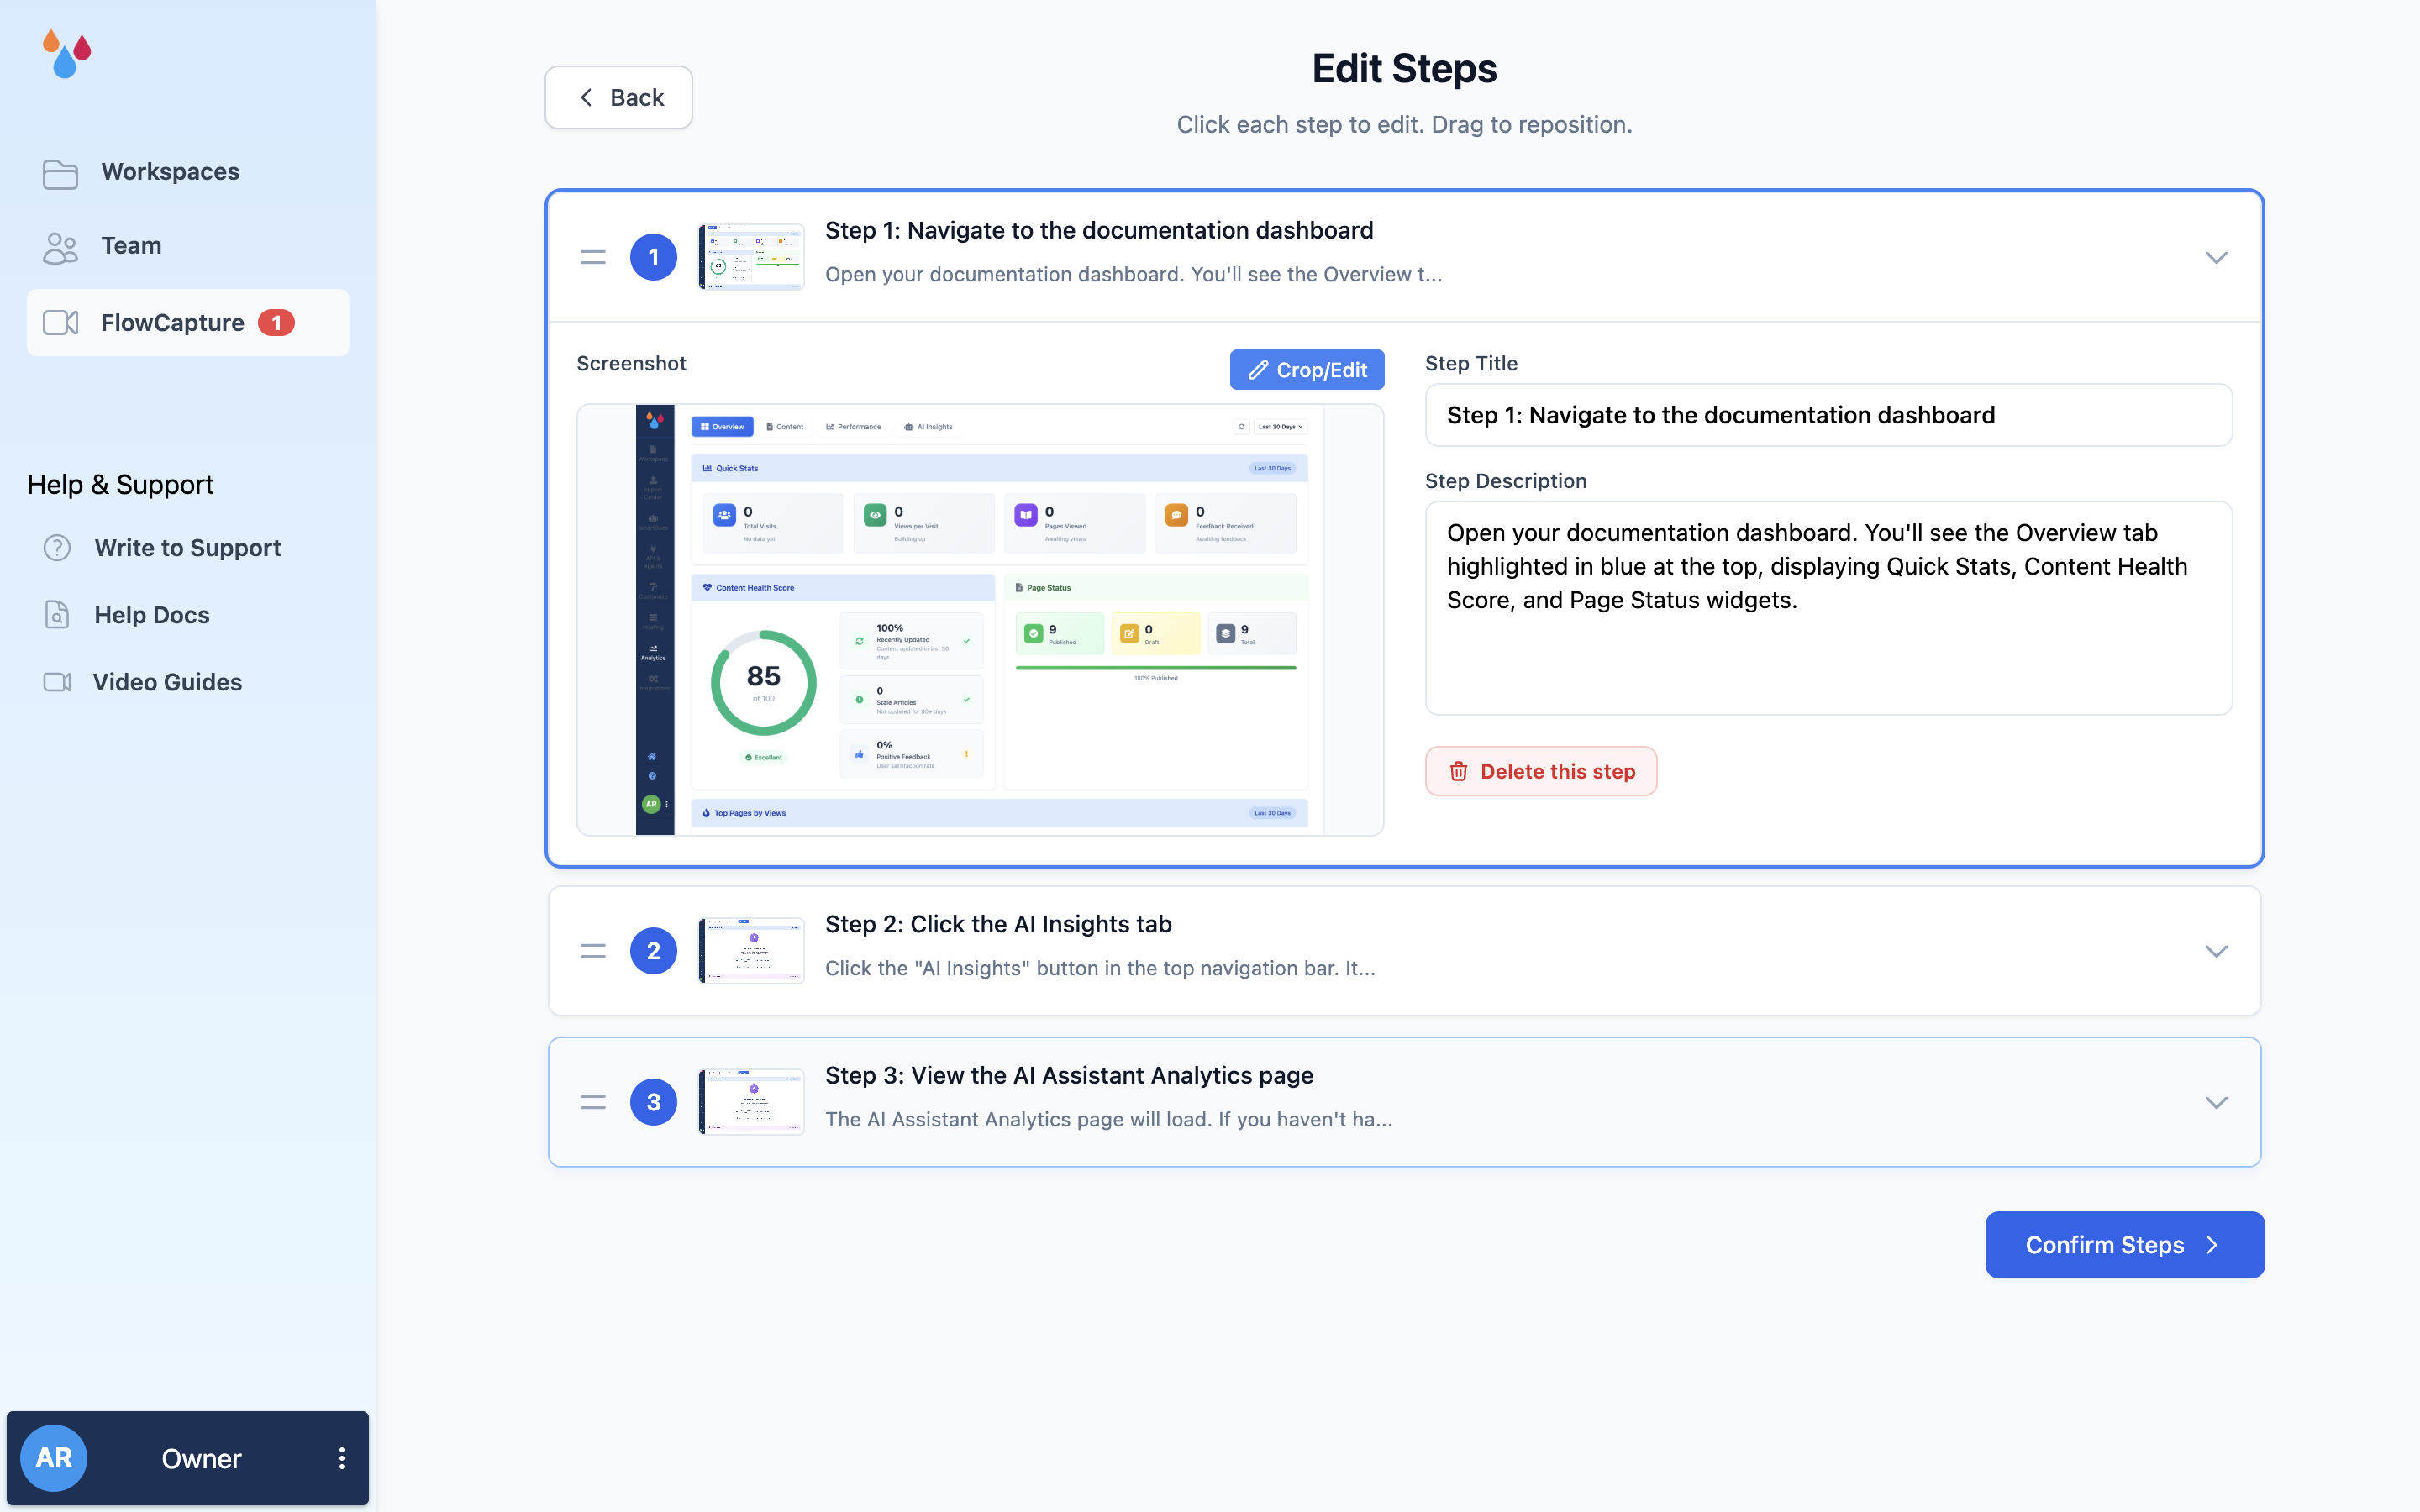
Step 1 – Edit Steps
The first screen is headed Edit Steps – "Click each step to edit. Drag to reposition." Each step is a collapsed row with its number, thumbnail, title and the first line of its description; click one to expand it. Per step you can change:
- Step Title – the bold line the reader sees. Dewstack writes these as imperatives ("Click the AI Insights tab"); keep that shape.
- Step Description – the paragraph under it explaining what happens.
- The screenshot – Crop/Edit, above the thumbnail, opens the image editor.
Delete this step removes a step you don't want. Drag a row by its handle to reorder. When the steps read correctly, click Confirm Steps.
Annotating a screenshot
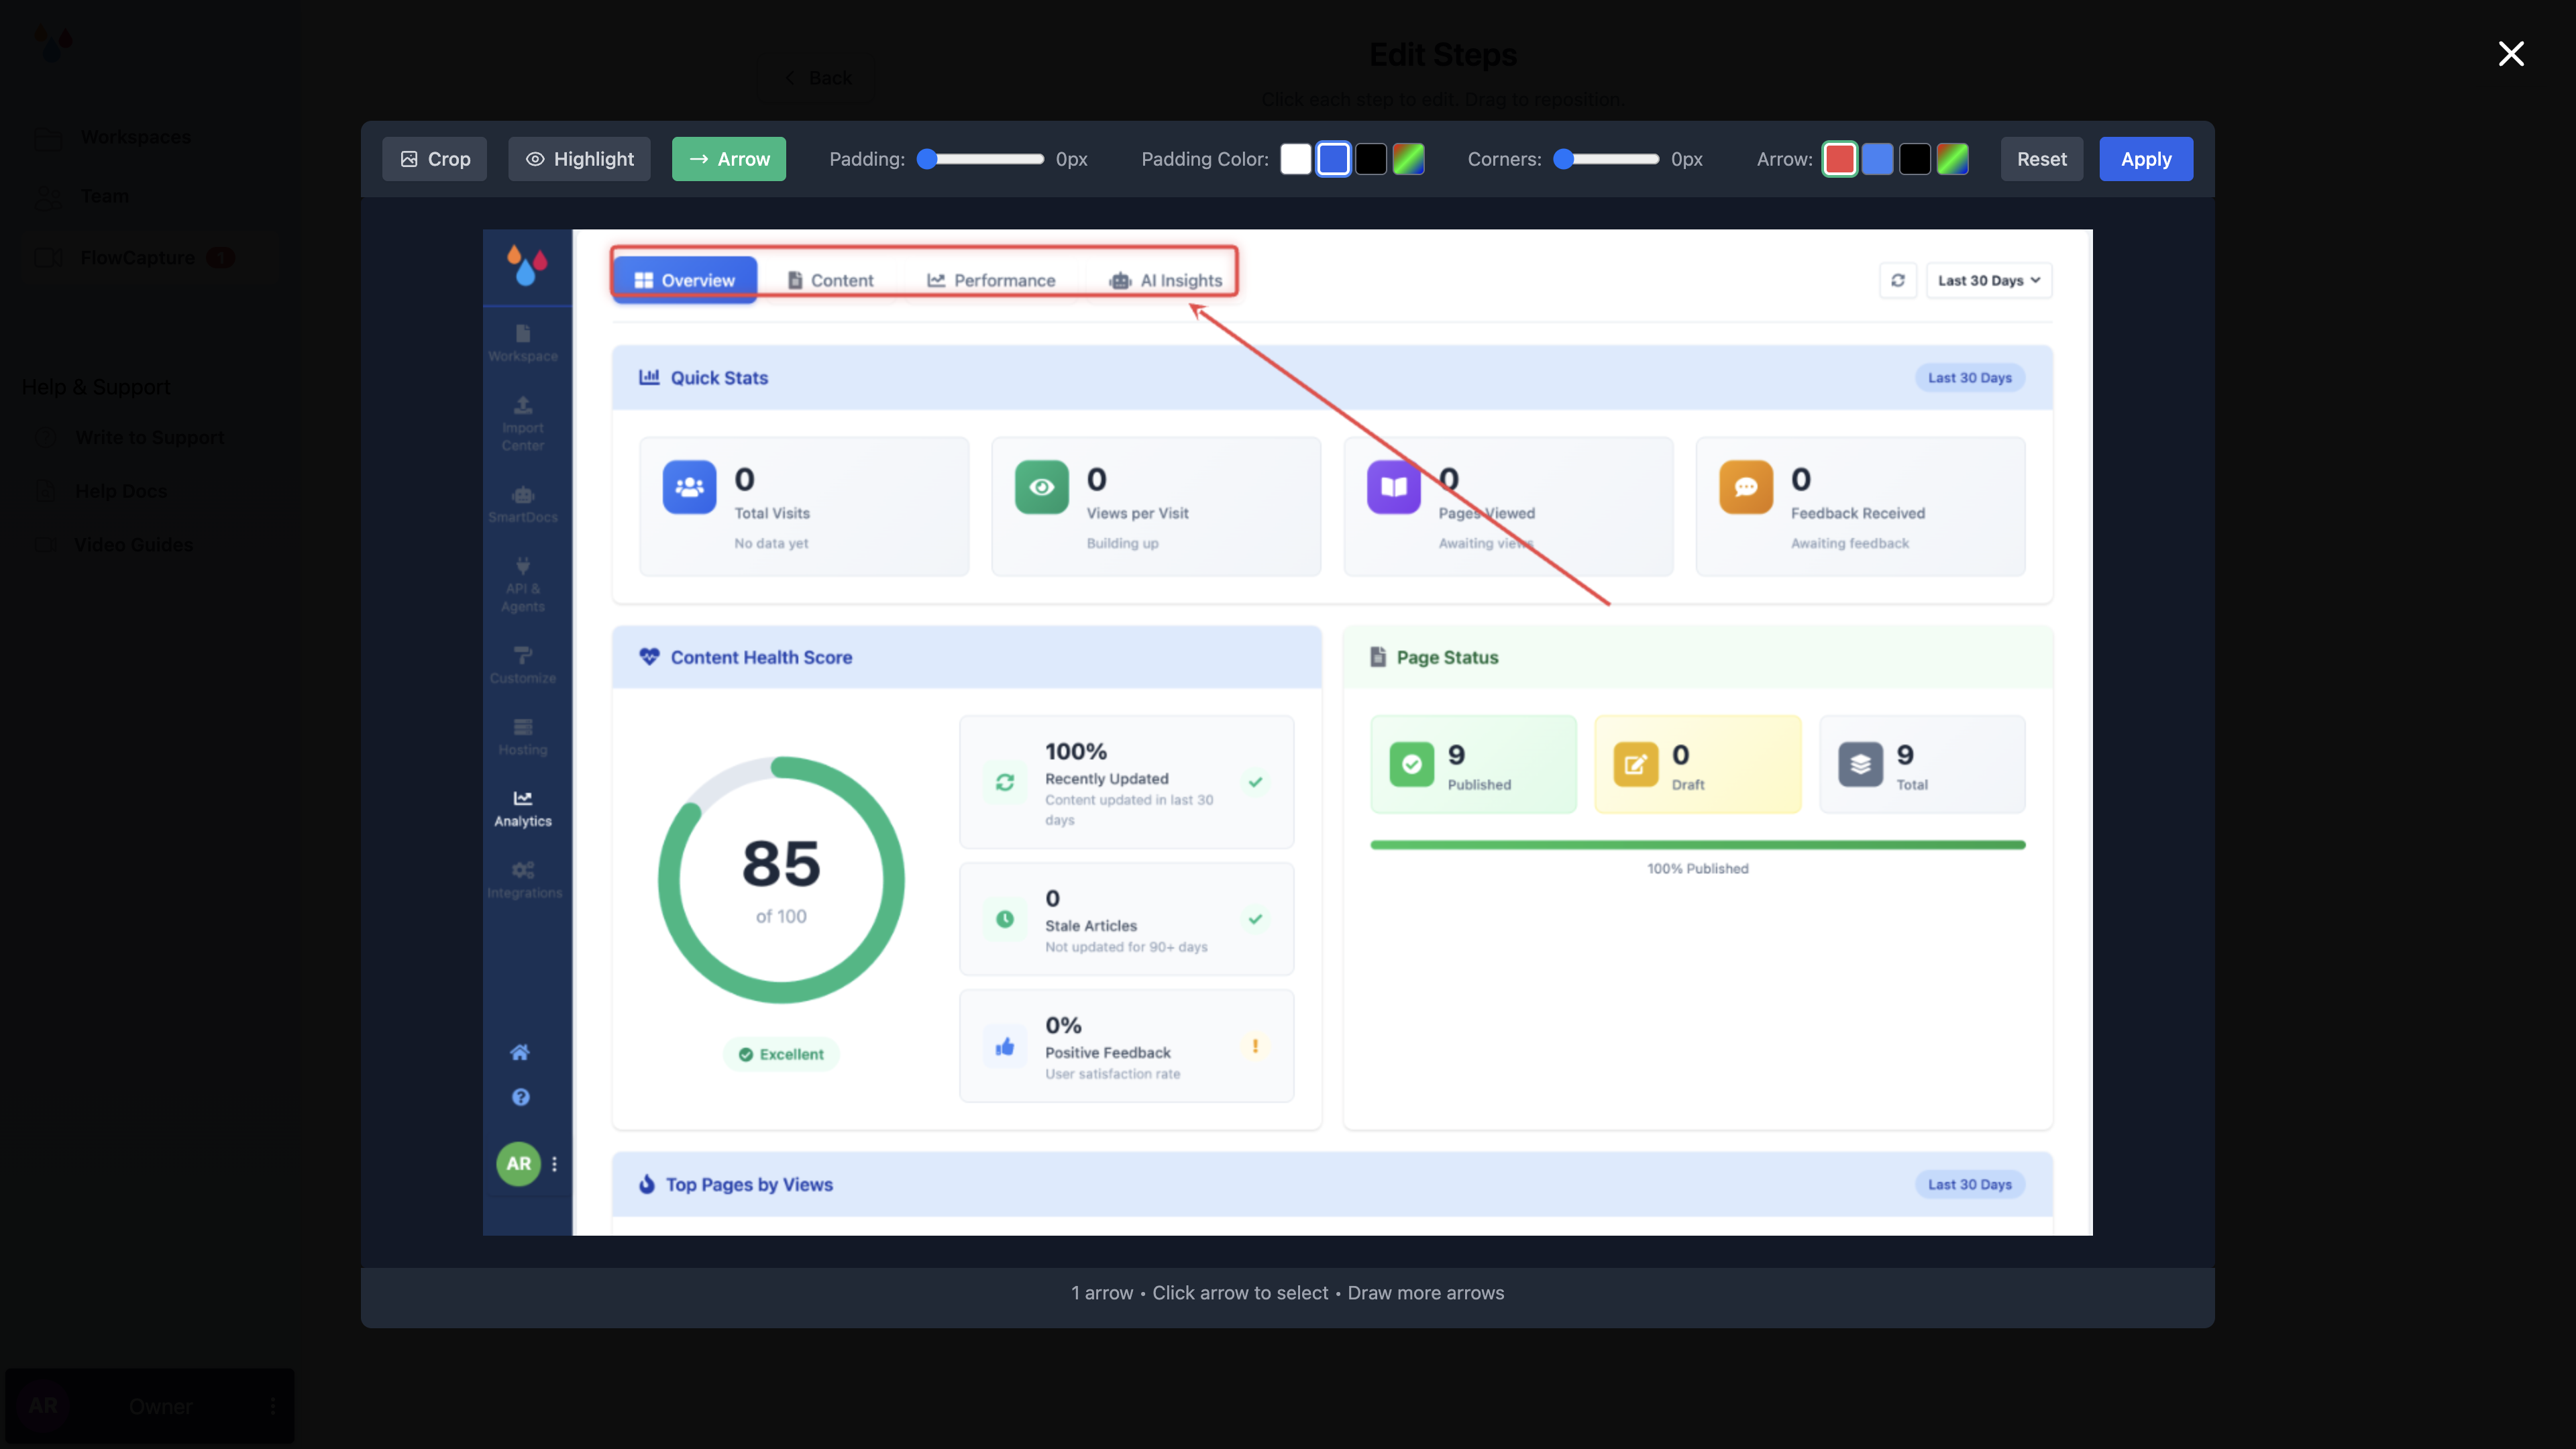
Crop/Edit opens the same image editor you get on an image inside a page – the full thing, not a cut-down version: Crop, one Highlight box, as many Arrows as you like, padding and rounded corners, then Apply.
This is the single highest-value edit on the page. A raw full-window screenshot tells a reader nothing about which of the forty controls you mean; a crop to the region plus an arrow at the button turns the same screenshot into an instruction.
Annotate before you generate the page
Edits made here are baked into the screenshots that Step 2 assembles. Annotating afterwards means opening the published page and editing each image again.
Step 2 – Review & Save
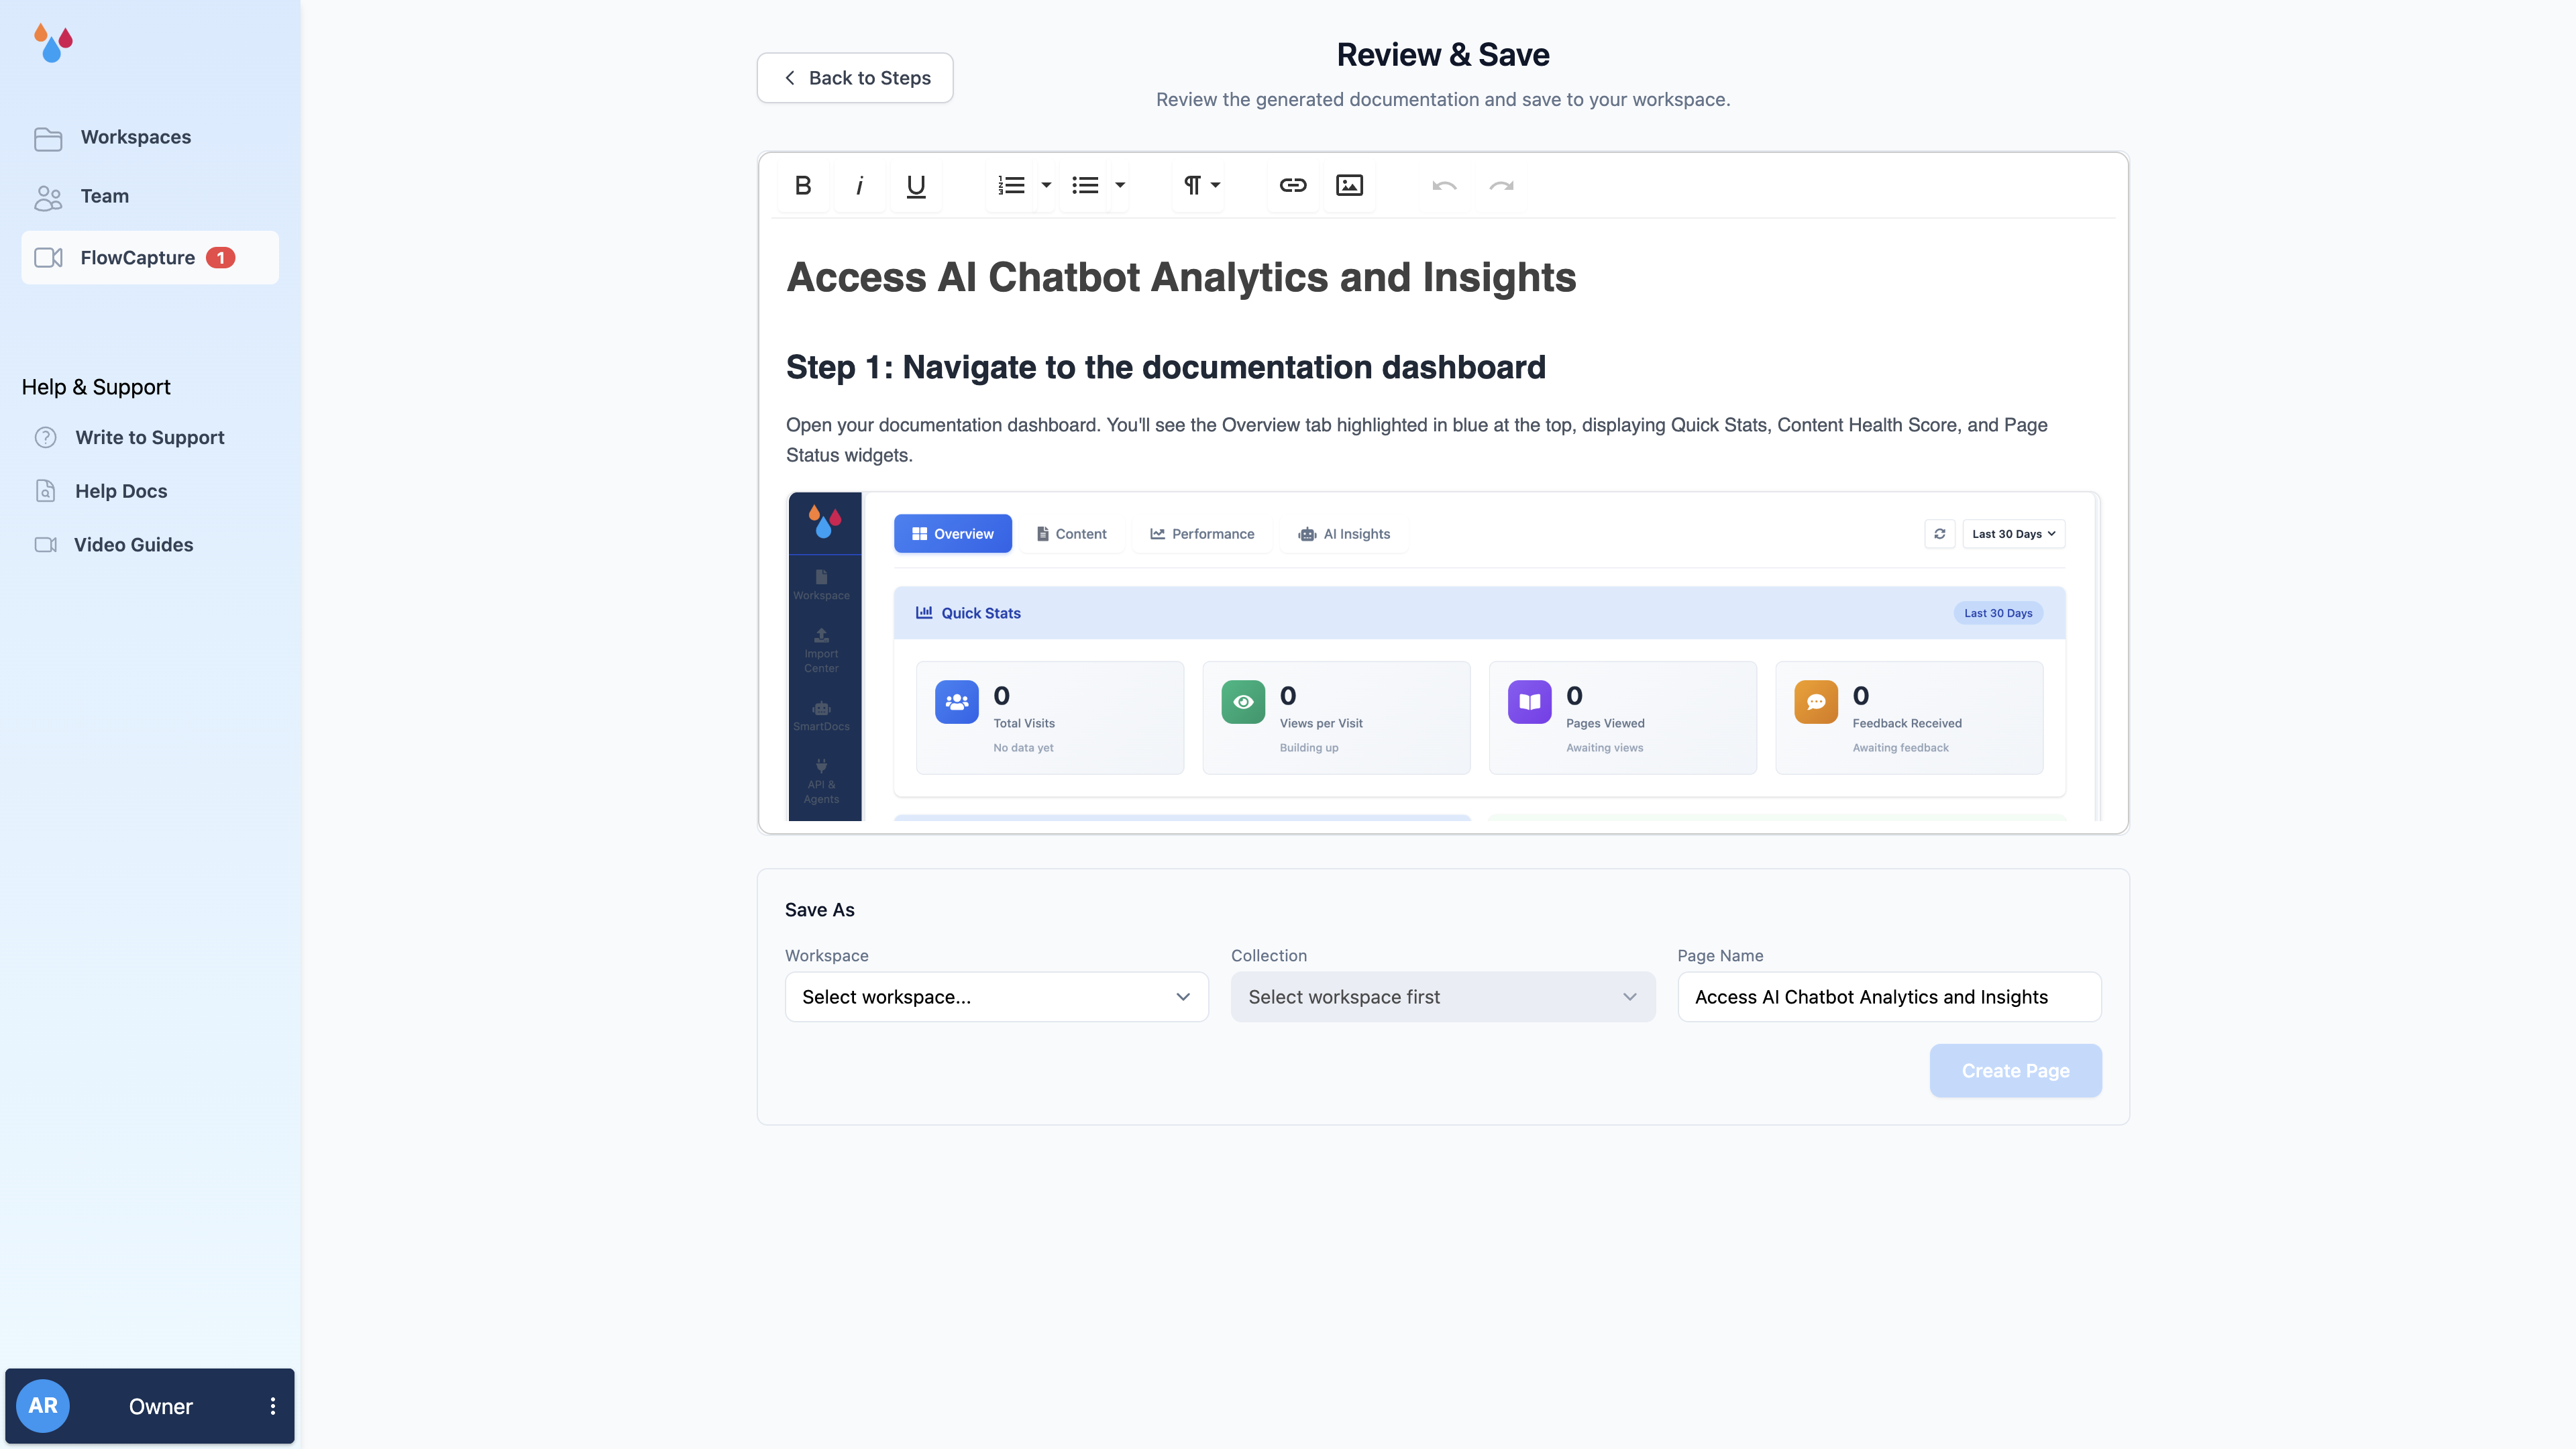
Review & Save assembles your steps into one page – title, a heading and paragraph per step, each screenshot in place – and puts it in an editor with a short toolbar: bold, italic, underline, ordered and unordered lists, paragraph format, link, image, undo and redo. It is enough to fix the writing. The richer blocks – callouts, tables, code blocks – come later, in the full editor, once the page exists.
This is where the draft earns its keep or doesn't. Two things worth doing every time:
- Rewrite the overview. Dewstack infers it from the screenshots, so it describes the clicks rather than the reason. Replace it with the sentence that says who needs this and when.
- Add what the screen doesn't show. Permissions, prerequisites, the field whose format matters, what to do when it fails. None of that was visible to the recorder.
Choosing where it lands
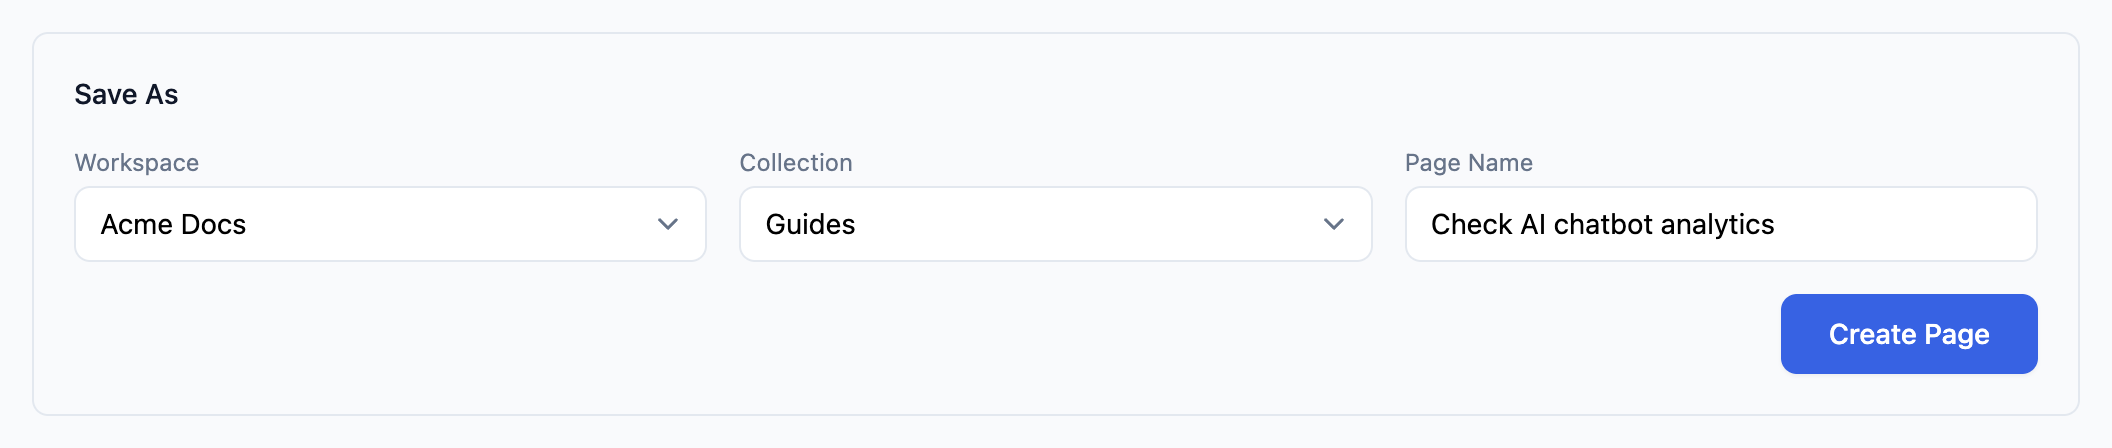
Under the editor, the Save As block picks the destination:
- Workspace – any workspace on your account. Collection stays disabled, reading "Select workspace first", until you choose one.
- Collection – the collections in that workspace. The page becomes a top-level page in it; you can nest it afterwards by dragging in the workspace editor.
- Page Name – pre-filled with the generated title. This is what becomes the page's URL slug, so it is worth shortening a long AI title here rather than renaming later.
Then click Create Page.
Create Page publishes immediately
The page is created with the status Publish, in the collection you picked, and appears on your docs site straight away. There is no "save as draft" option in this flow. If you want to keep working on it privately, create it and then set it back to Draft from the workspace editor – see Save and publish a page.
The page it creates is an ordinary Dewstack page. Nothing about it stays linked to the recording: edit it, move it, translate it, delete it like any other.
Dismissing a capture
If a recording is not worth keeping, click Dismiss on its card in the FlowCapture Updates list. It leaves the list and does not create a page. Dismissed captures are not recoverable, so re-record rather than hunting for them.
What FlowCapture does not do
- It always creates a new page. FlowCapture does not detect that an existing page has gone out of date, and does not update one. Re-recording a changed workflow gives you a new page to copy from, not an updated one.
- It does not track your product for changes. Captures only exist when you record.