The Dewstack editor is a WYSIWYG ("what you see is what you get") editor: it renders your page inside a frame that already carries your docs site's brand font and content styles, so what you see while writing is close to what your readers get. Everything is on one toolbar at the top.
This page walks the toolbar by what you are trying to do rather than left to right, because the groups are not in the order you will reach for them.
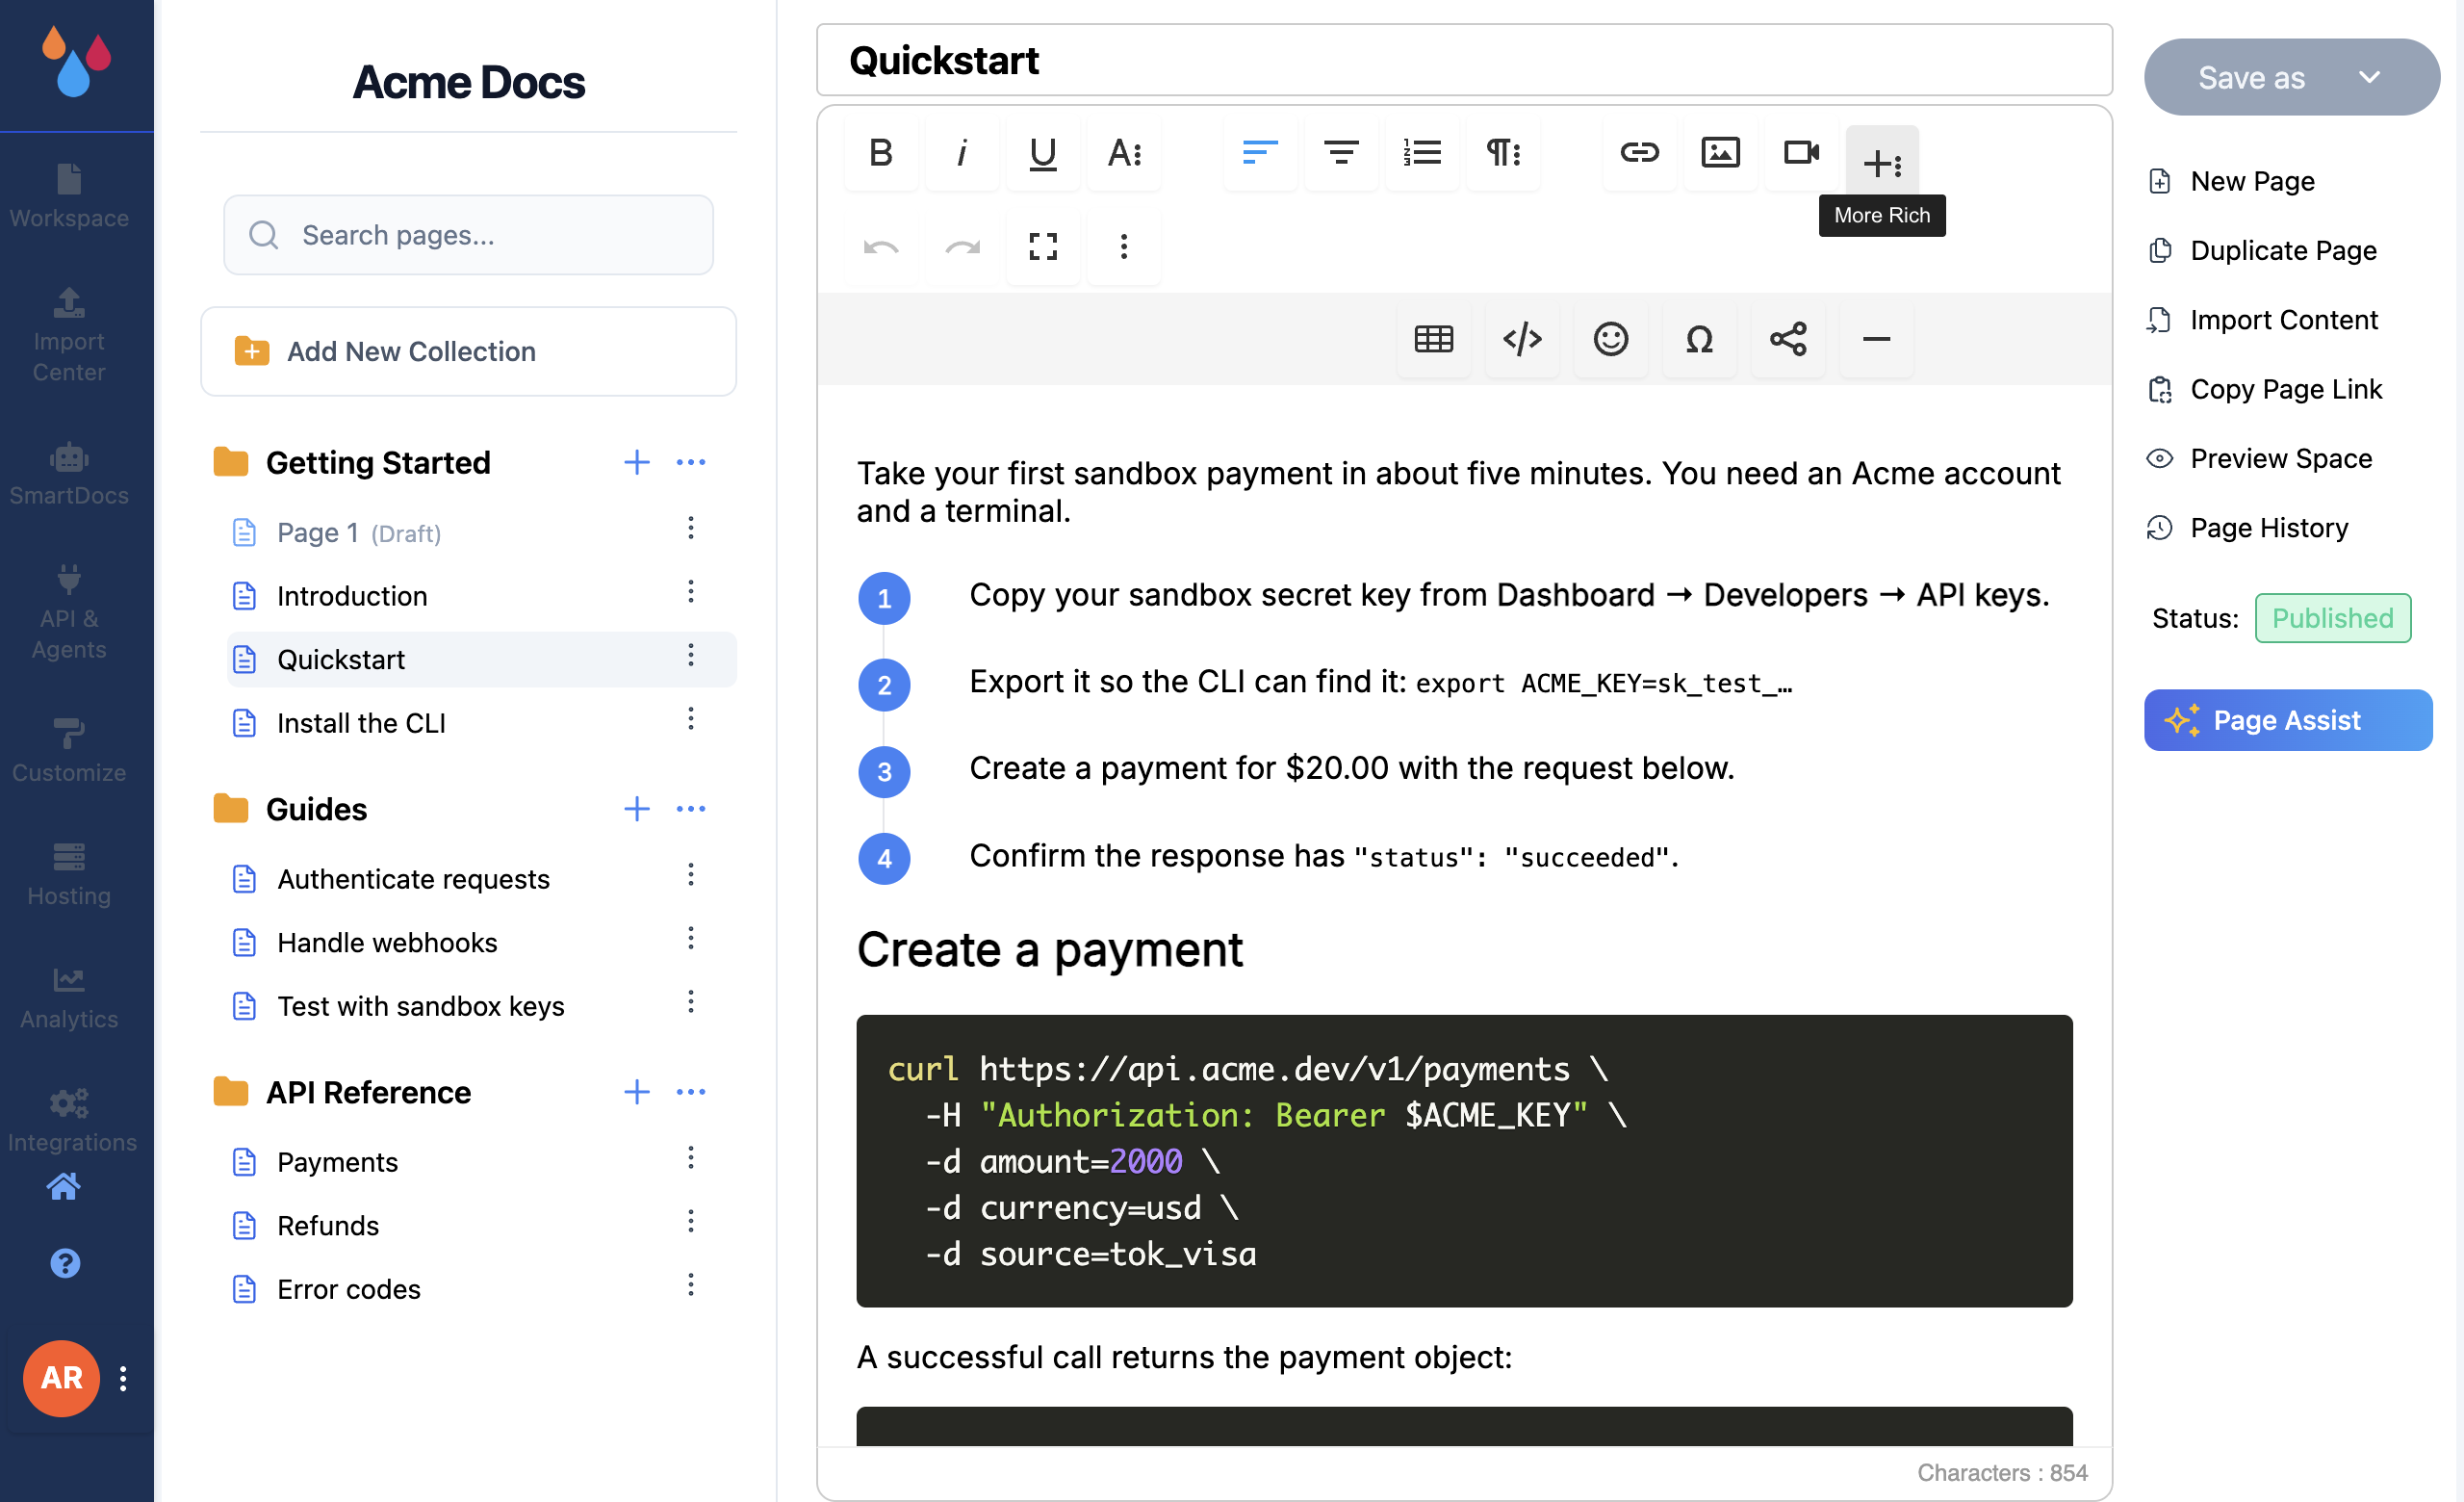
Structure: headings and lists
Paragraph Format is the dropdown that matters most in a docs tool. It sets a block to Normal, Heading 1 through Heading 4, or Code.
Use real headings, not bold text at a large font size. Your docs site builds each page's table of contents from actual heading tags – H1 and H2 become top-level entries, H3 and H4 become indented ones – and headings are also what search and AI assistants use to find the right part of a long page. Bold text does nothing for either. Dewstack will nudge you about this: save a page longer than about 1,500 characters with no headings in it and you get a tip toast saying so.
Alongside it:
- Ordered List and Unordered List, with dropdowns for the marker style – numbers, letters or Roman numerals; discs, circles or squares.
- Increase Indent / Decrease Indent for nesting list items and indenting paragraphs.
- Align Left / Center / Right / Justify, and Line Height.
Emphasis: bold, colour and inline styles
Bold and Italic sit at the far left. Click the A: button beside them to expand the rest of the group: Underline, Strikethrough, Subscript and Superscript, then a set that changes how text looks rather than what it means: Font Family (15 web fonts including Inter, Roboto, Open Sans, Poppins and PT Serif), Font Size (8 to 96), Text Color, Background Color, Inline Class, and Clear Formatting, which strips everything back to plain text.
Reach for Clear Formatting after pasting
Pasting from Word, Google Docs or another docs site brings that page's fonts, sizes and colours with it. Select the pasted block and hit Clear Formatting – the result inherits your own theme instead of fighting it, including in dark mode.
Links
Insert Link takes a URL, or picks from a list of every page in the current workspace. The list
is labelled Collection -> Page, so linking to another one of your own pages is a two-click job
and you cannot typo the slug.
Media: images, video and tables
Images
Insert Image offers Upload Image – drag a file in or browse for one – and By URL. Uploads are stored on Dewstack's image CDN, so the image keeps working after you publish.
Click an image once and its own toolbar appears above it: replace it, align it left/centre/right, add a caption, change display (inline or block), apply a style, set alternative text, change its size, remove it, and Advanced Edit.
- Insert the screenshot with Insert Image → Upload Image.
- Click the image, then Advanced Edit.
- Use Crop to trim it, Highlight to box the part that matters, and Arrow to point at a control.
- Click Apply. The annotated version is uploaded and swapped in.
Advanced Edit has its own page – see Image Editor for every tool, and for what applying an edit permanently bakes in.
To resize, drag the corner handles, or use the size control on the image toolbar to type exact dimensions. Always fill in the alternative text – it is what screen readers announce and what an AI assistant reading your docs sees in place of the picture.
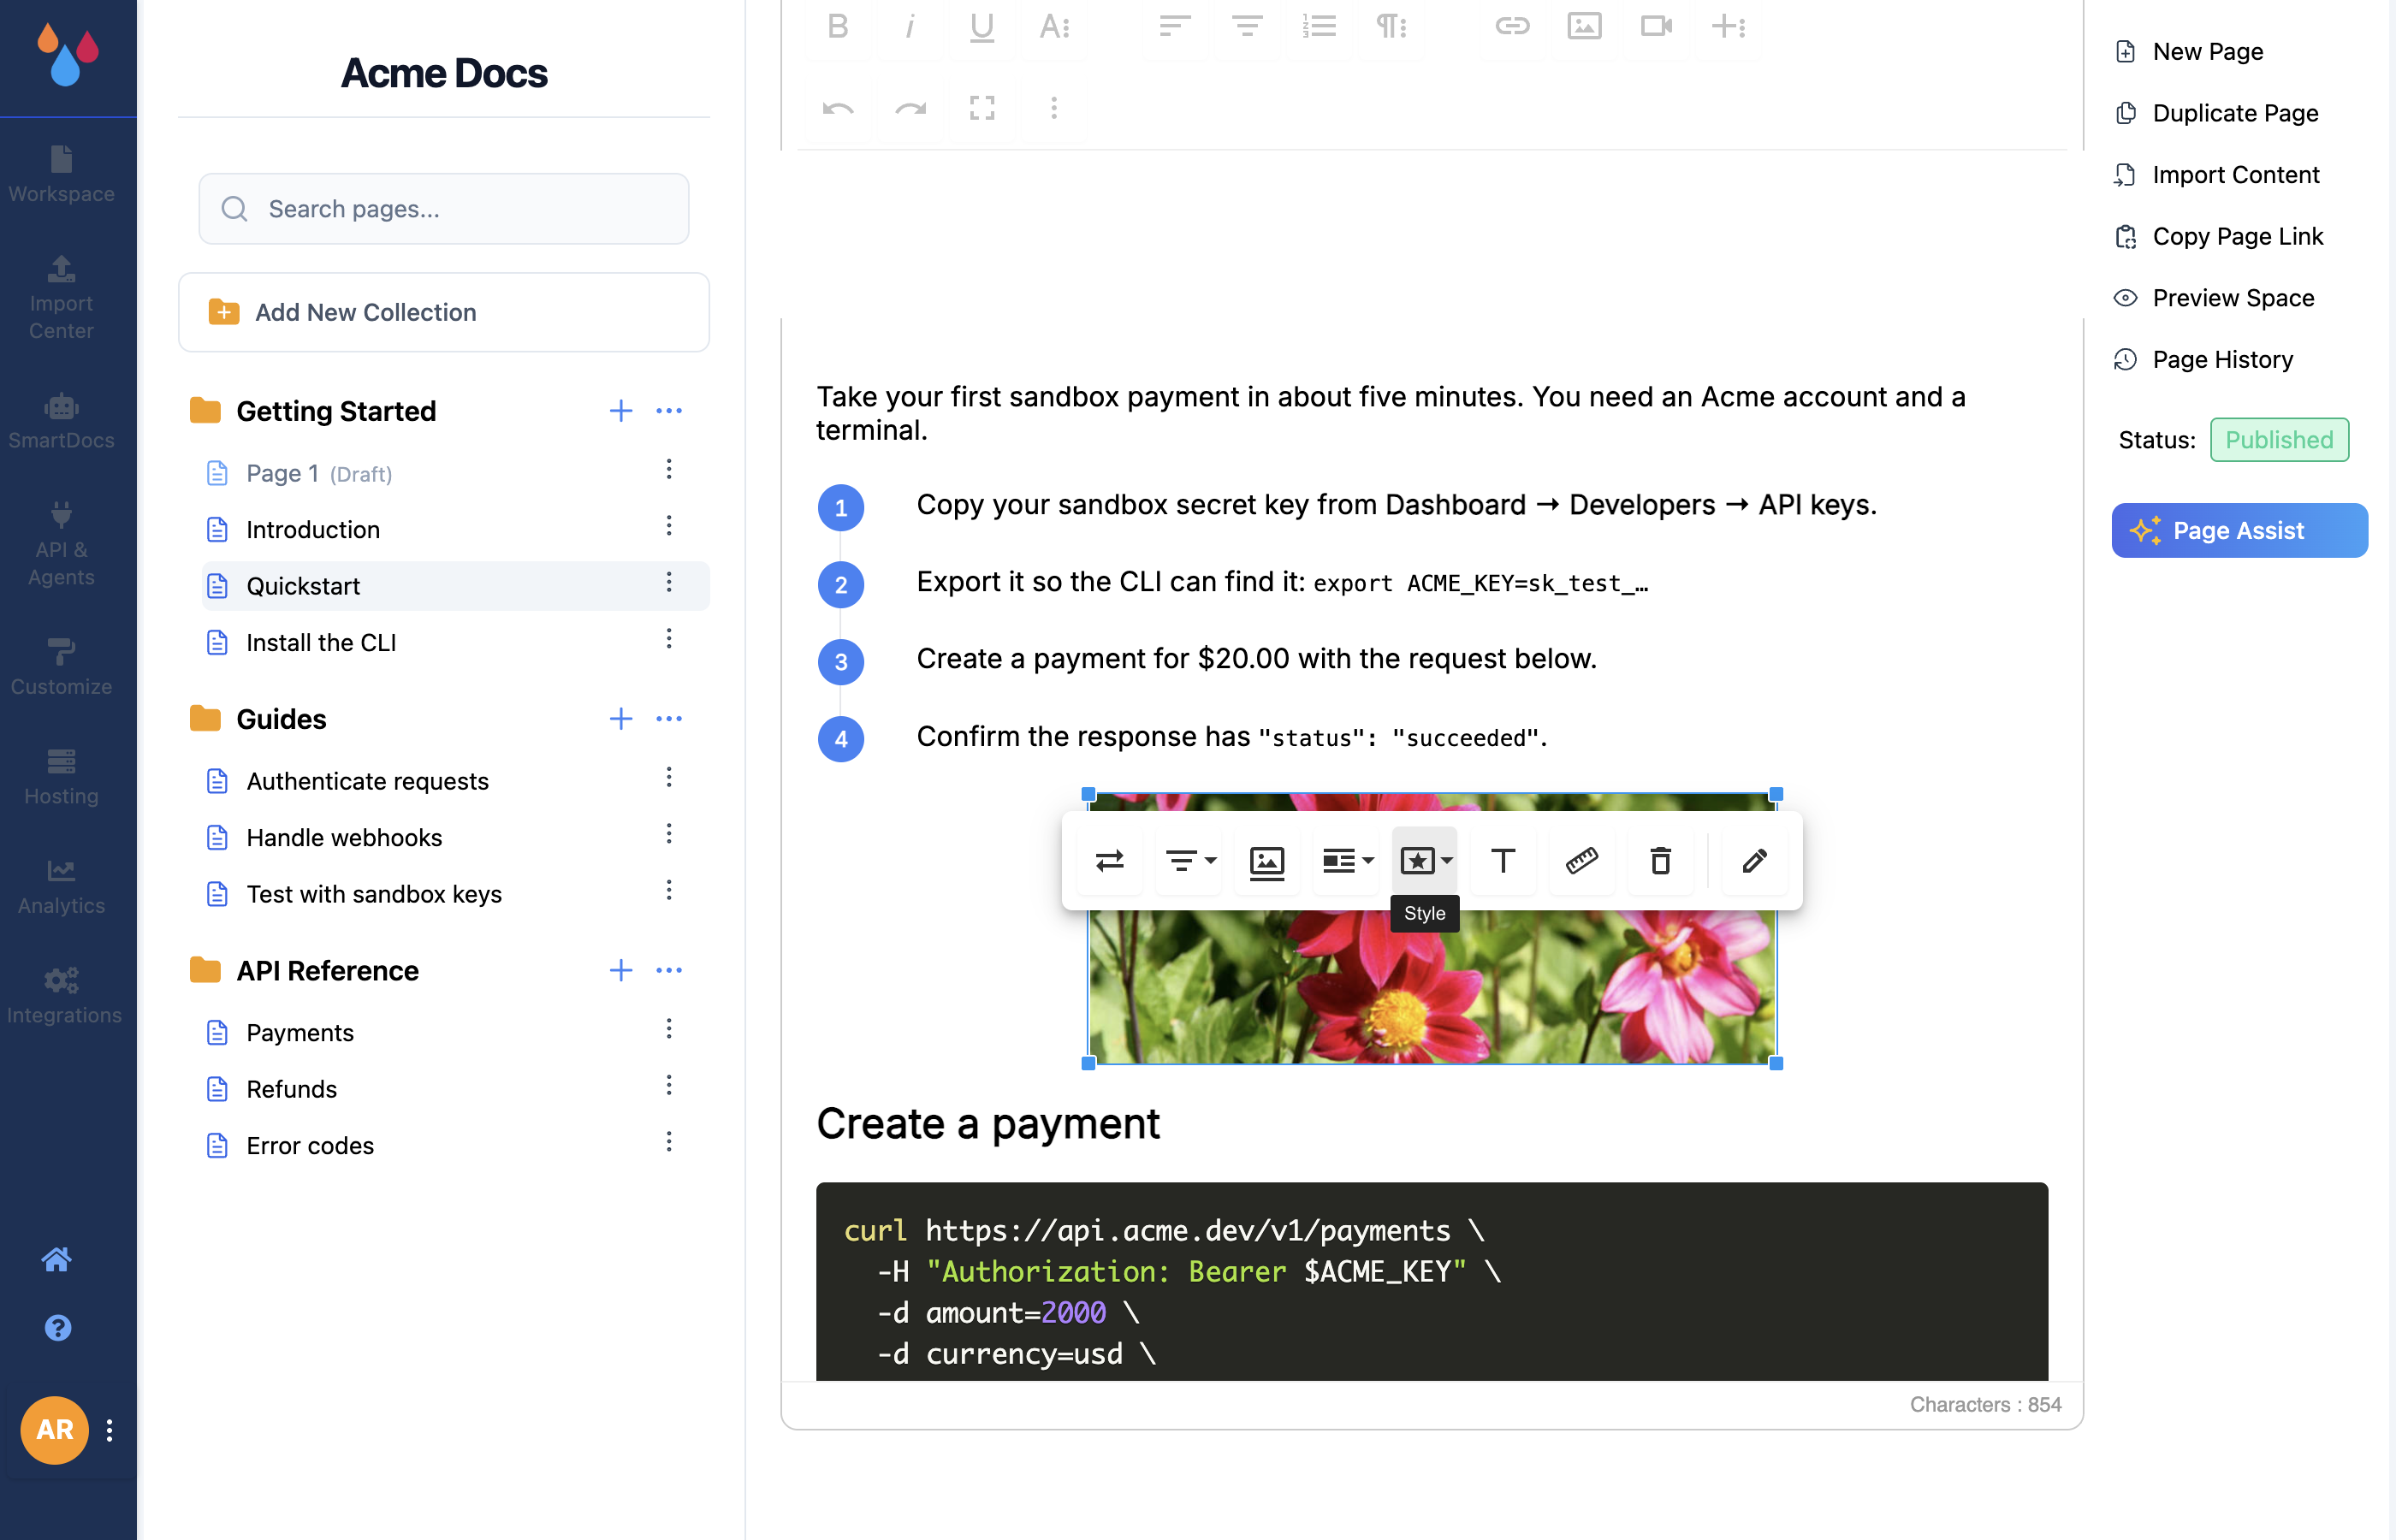
Image limits: 5 MB per file, and only JPEG, JPG, PNG and GIF are accepted. SVG and WebP are not – convert them to PNG first.
Video and other embeds
Insert Video takes a video URL or a block of embed code. Embed URL handles everything else – slide decks, forms, dashboards and the rest – by expanding a shareable link into an embed. See External Platform Content Embeds for what survives publication and what needs a script.
Tables
Insert Table drops in a table from a size grid. Click into any cell and a table toolbar appears for inserting and deleting rows and columns, merging and splitting cells, setting cell background and alignment, and turning header rows on.
Tables are for comparing a fixed set of things – plans, parameters, status codes. If a cell holds a paragraph, it should have been a heading and some prose.
Blocks
Blocks is the grid button in the middle of the toolbar. It is the one control worth learning first: it inserts the six presentation blocks that Dewstack styles for you, so you never have to build a coloured box by hand.
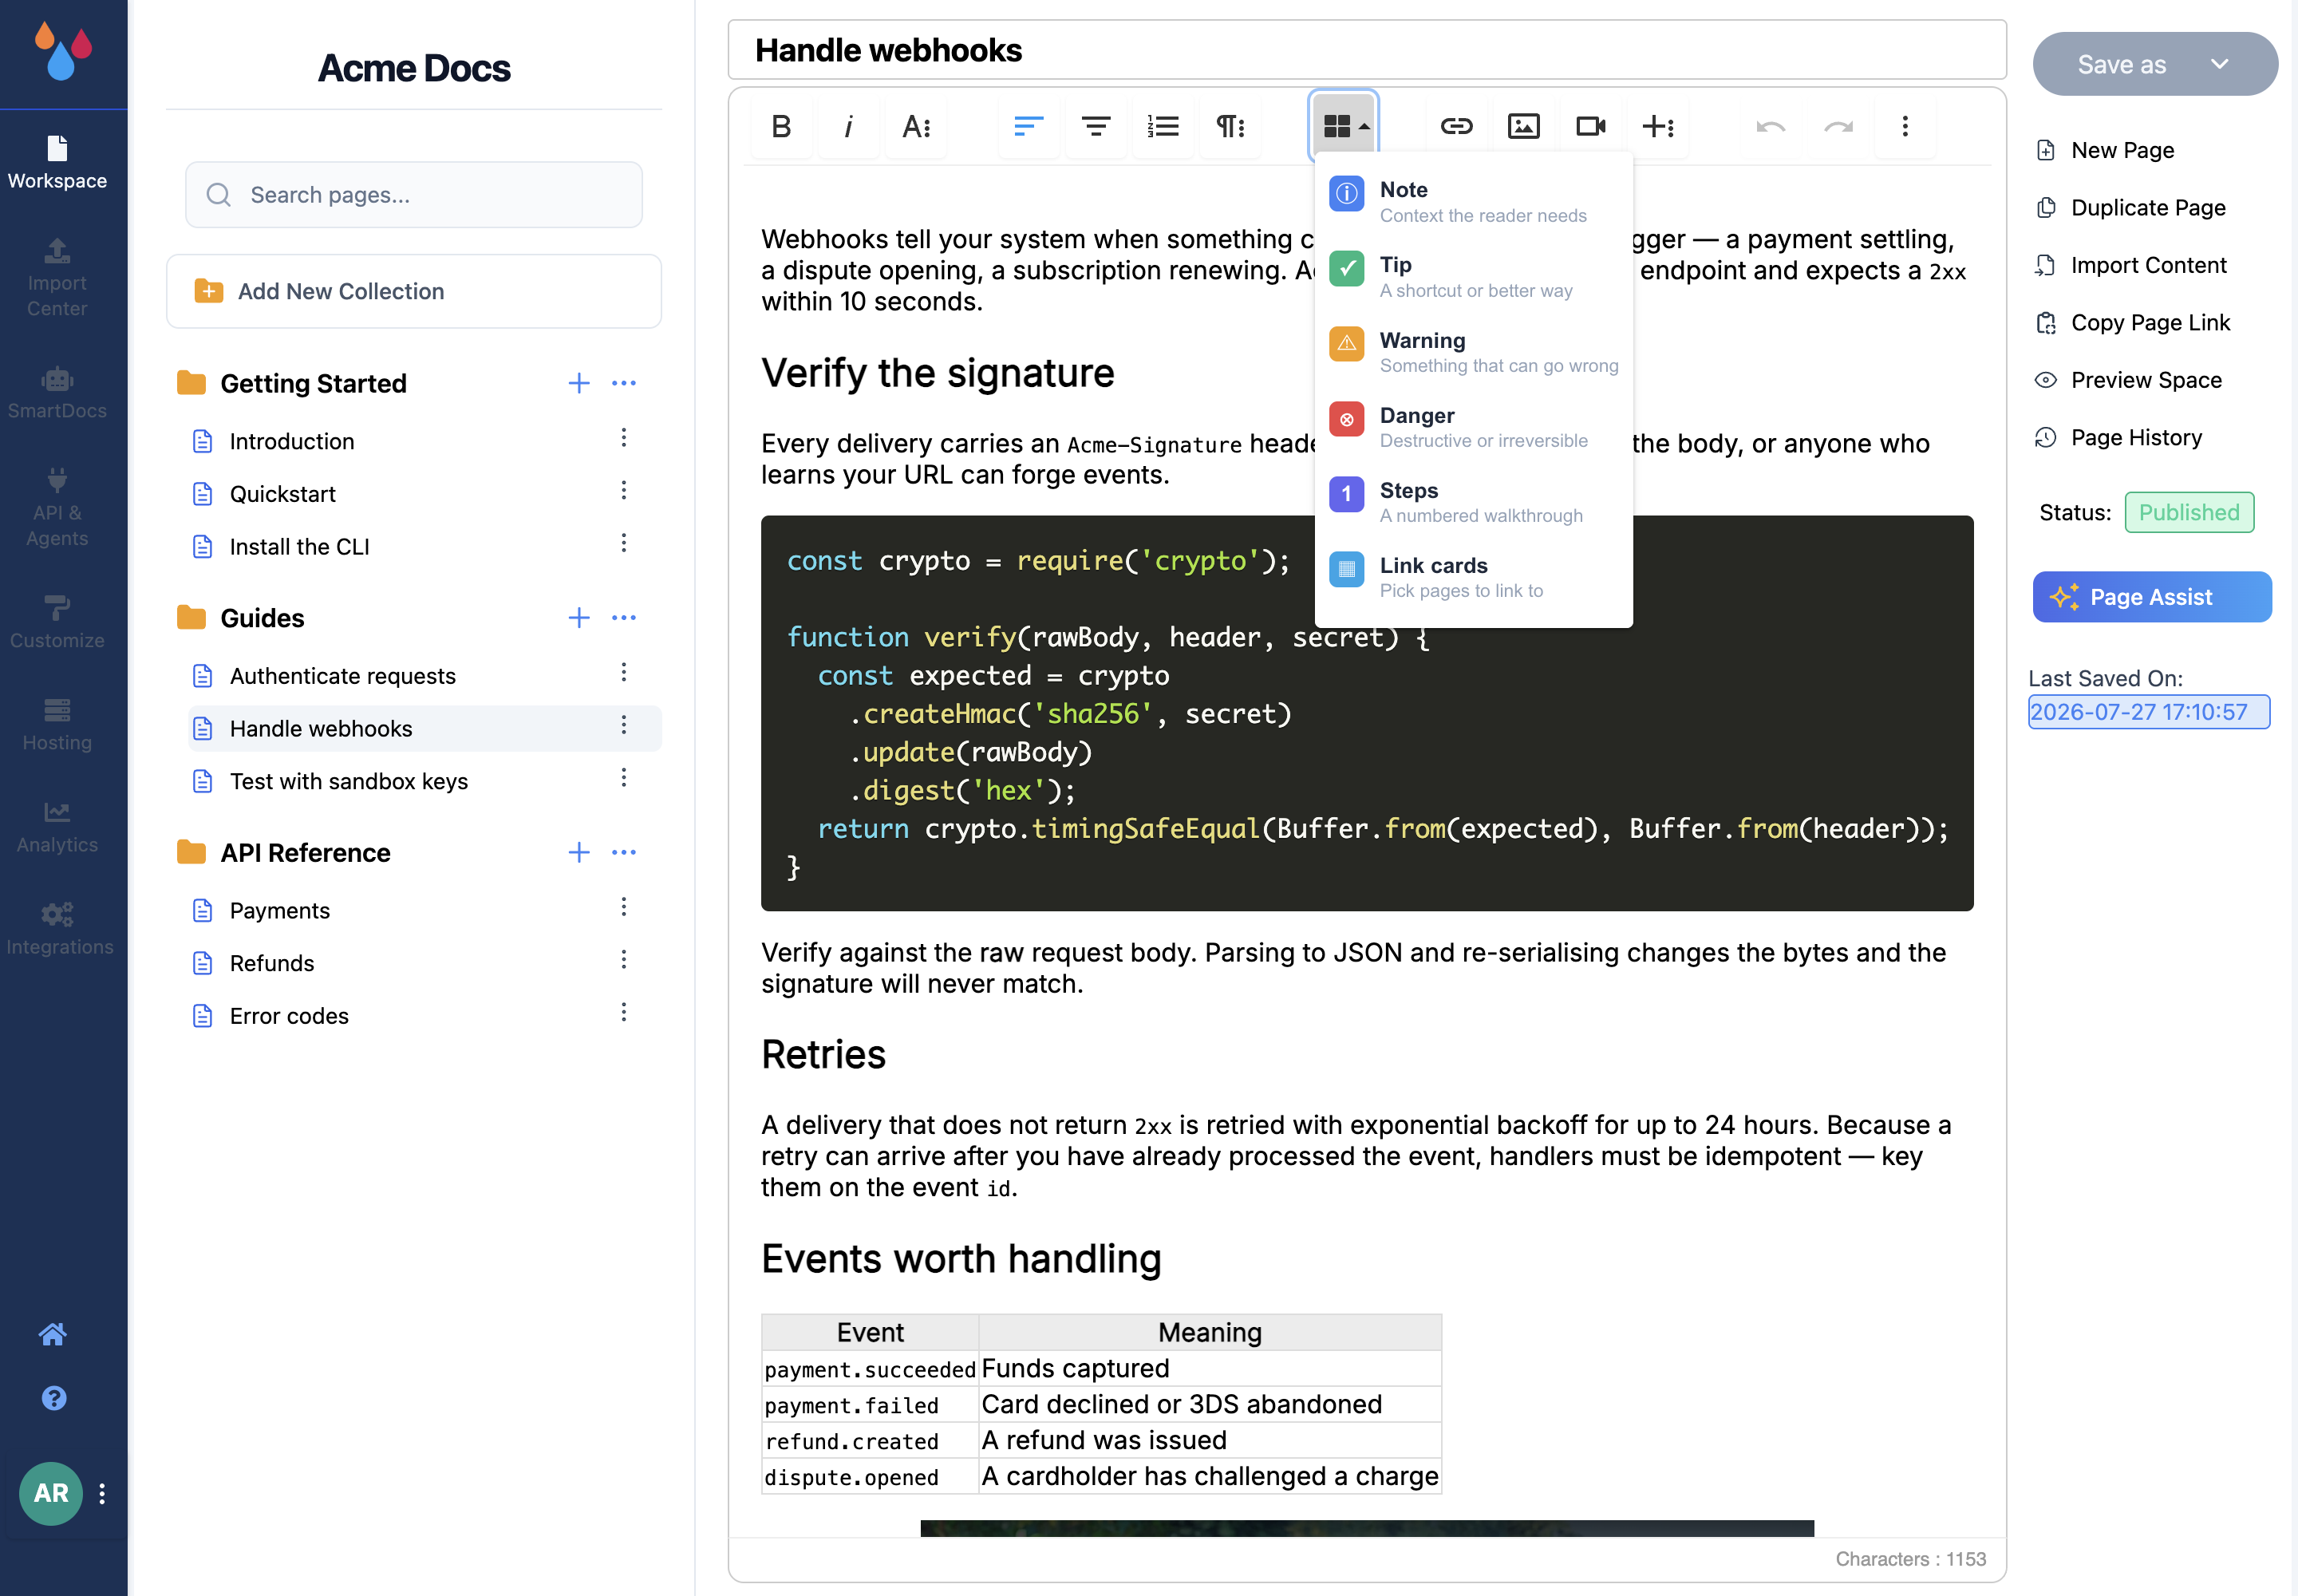
| Block | What it is for |
|---|---|
| Note | Context the reader needs but would not have guessed. |
| Tip | A shortcut, or a better way to do the thing they just read. |
| Warning | Something that can go wrong, and how to avoid it. |
| Danger | Destructive or irreversible. Deleting, overwriting, rotating a key. |
| Steps | A numbered walkthrough, rendered with connected step markers. |
| Link cards | A grid of links to other pages in this workspace. |
Pick one and it drops a filled-in block at the cursor with placeholder text you overwrite. A callout is an ordinary block of content, so you can put lists, code and links inside it.
The four callouts are the same four you get from :::note, :::tip, :::warning and :::danger
when content arrives through import or an agent, and Steps is the same as :::steps – one set of
blocks, whoever wrote the page.
Use them sparingly
A page where everything is in a coloured box is a page where nothing stands out. If two callouts are next to each other, one of them is a paragraph.
Link cards
Link cards is the odd one out: instead of inserting placeholder text it opens a page picker, grouped by collection with a search box. Tick the pages you want, click Insert, and each one becomes a card carrying that page's title and a description line for you to replace.
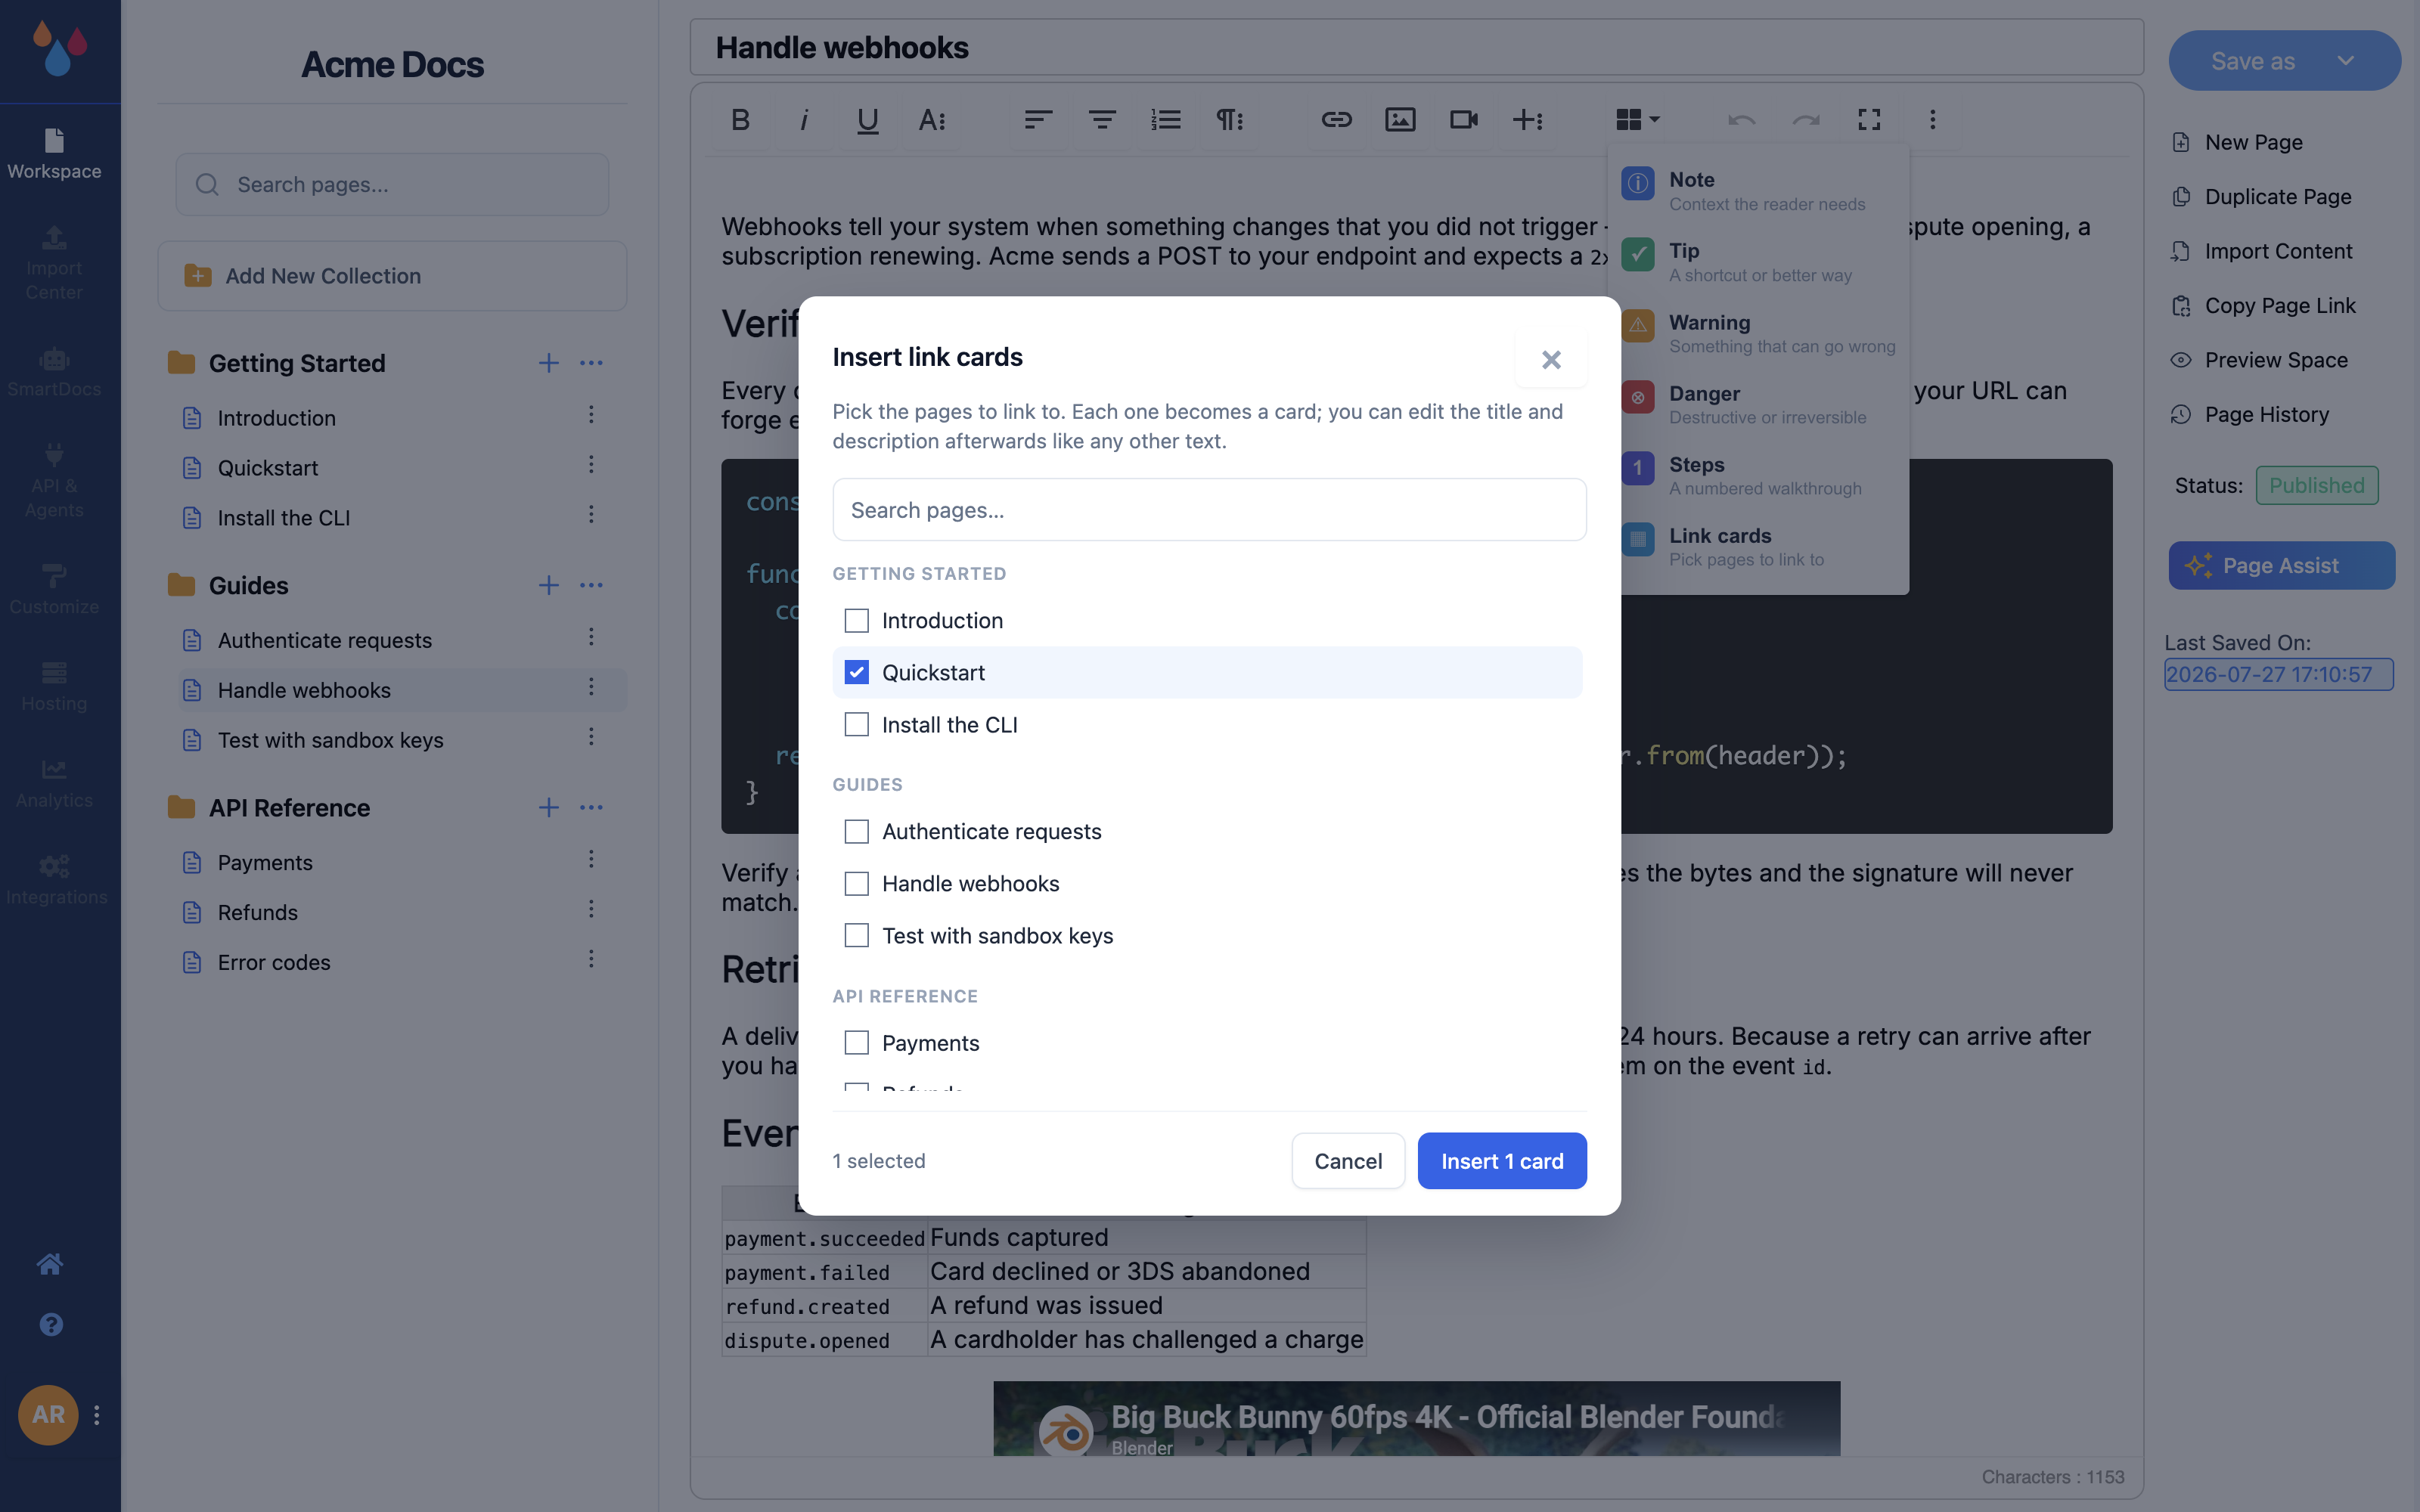
This is what the Related block at the bottom of these pages is made of. Cards are ordinary links once inserted – edit the title and the description like any other text.
Code, quotes and dividers
Add Code Block opens a dialog where you pick a language and paste your code; it publishes as a framed block with a language label and a Copy button. It has its own page: Code Blocks.
Quote indents a block as a pull quote. Insert Horizontal Line, Emoticons and Special Characters round out the group.
The rest of the toolbar
Undo and Redo sit at the right-hand end, and the ⋮ beside them opens the rest: Fullscreen to hide the sidebar and write on the whole screen; Print; Select All; Help for the keyboard shortcut list. A live character count runs in the bottom corner.
Code View swaps the editor for the page's raw HTML. It is the escape hatch for anything the toolbar cannot express – hand-written tables, a third-party iframe, a stray tag you want to delete. Edit the HTML, click the button again, and the visual editor comes back with your changes.